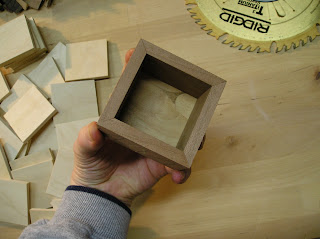
We’re having a heat wave…a tropical heat wave… Well, 33 degrees in February, in Minnesota is practically tropical! After just a couple hours of prep time with the heater, the shop was actually pretty comfortable to work in.
Today I broke out the new Freud rip blade my Dad sent to me for my birthday last year. He and I were discussing the need for a blade with a flat tooth grind to cut clean, flat grooves for corner splines on boxes. I thought I’d have to special order a blade, but he remembered that Freud had a 24 tooth rip blade with a flat grind. He called me back about an hour after our conversation and said not to order anything, and that my birthday present was on the way.
I knew I’d be adding corner splines on some of these boxes, so I decided to also use the blade to cut the grooves in the box sides that will receive the bottoms. Not only does this blade cut a flat bottom, but the kerf is exactly 1/8 inches wide…just the right size for the grooves.
One of the keys to making this many boxes at once is keeping all the parts together and in line. To cut the grooves while keeping the parts in order, I marked each side piece with an arrow to indicate the position of the top of the box.
I set the blade for a 3/16 inch deep cut, and set the rip fence at 1/4 inch away from the blade. I then used the arrow as an indicator in relation to the fence so that none of the parts would get flipped around. For my practice run I used the cherry pieces I cut when testing the set-up of the cross-cut miter sled.
The new blade worked like a dream. Nice clean, flat bottomed grooves…isn’t that a Queen song? “Flat bottomed grooves you make the rockin’ world go ‘round.”
Once I was happy with the groovy test results I started dishing up box parts, one species at a time.
A little safety reminder here. When cutting multiples in a repetitive process remember to pay attention to what you’re doing on every cut. It’s easy to get a little lax when you’ve just cut over 100 grooves. The last cut warrants the same attention that the first one did.
Now this is what I call gettin’ a groove on!
Once the grooves were cut it was time to start sizing the bottom pieces. I used the finished sides to measure from to ensure that the bottoms would fit.
The end to end measurement of the length of the grooves came in at 2 and 9/16 inches. When setting the rip fence on the table saw I laid the sheet of 1/4 inch Baltic Birch plywood (which will be used for the bottoms) against the rip fence and placed the ruler at the edge of the board. This made setting the width very easy. I’m looking for a width that’s a little under the full length of the groove. I want the bottoms to fit snuggly, but not too tight. They'll be glued in place, so a little room needs to be left for the wood glue. I backed off a 1/32 of an inch and set the fence for 2 and 17/32 inches.
I made the first rip and then checked it against one of the grooved sides. That’s the fit I’m looking for.
I ripped a total of four strips of the Baltic Birch. The next step was to cut square pieces that will become the bottoms of the boxes. To ensure the parts were square I used one of the ripped strips to set the distance between the blade and a stop bock on my cross-cut sled.
Once the stop was set, it was just a matter of minutes to cut plenty of perfect squares.
The plan called for a rabbet around the box bottom pieces to create a tongue that will fit into the grooves in the box sides. It was time for another blade change, the third as part of today’s work. I installed the 40 tooth Oldham blade and a zero clearance insert. It’s a wide kerf blade that will cut the rabbets I need in just one pass per side.
I set the blade height to 3/16 of an inch and positioned the rip fence to just under half the thickness of the pieces. This is another one of those processes that requires your full attention to execute…especially when cutting as many as I needed to. I had a couple of them jump on me when I accidently lifted the piece just a hair as it engaged the blade. No injuries, but it sure made a loud pop and got my attention real fast!
After finishing the first bottom I did a dry fit on the Cherry test pieces.
The fit turned out great with all four sides in place. I noticed a big difference between this time around compared to the first run of boxes I made. The flat bottomed grooves made fitting the pieces much easier. I remember having to make multiple trimming tweaks last time without the flat grind blade.
With a successful test under my belt I finished up all the bottom pieces.
The next step for all these box parts is some serious sanding. There are still another handful of boxes that are varied in size, so they’ll need bottoms cut as well, and those special Padauk boxes will need to be sized and trimmed to capitalize on that stunning grain pattern.
Boy, I may need to run the AC in the shop tomorrow. We’re expecting a high of a blistering 40 degrees here in the Twin Cities. I’m sweating up a storm just thinking about it. Bum, bum, bum…a tropical heat wave…
Pete


1 comment:
Lookin good Pete !
Post a Comment