Pages

Monday, February 27, 2012

CO Workshop Update #8 - Measure once, cut once, build another one.

Things moved along pretty well over the weekend here in the Second Wind Workshop.  I was able to get the OSB up on the back wall, and Danger Boy and I got some painting done…some of it even on the walls!

I also repurposed an old wall cabinet and set it up on one of the shorter steel racks.  It’s just a step away from the table saw so I’ll store saw blades, jigs and accessories in the cabinet and all of my sleds on the shelves.  There was also just enough room for the, all important, shop fridge.

While setting up the cabinet and fridge Danger Boy was thrilled to find his toolbox and start reacquainting himself with his tools.  It was all I could do to keep him from disassembling everything in the shop and from wanting to cut into every piece of wood with his coping saw…while wearing eye and hearing protection, of course.

After heading off the maniacal woodworker, we got busy on some shelving for the back wall.  The plan is to hang shelving along the top of the wall with pegboard and a long storage bench below.  I had a whole stack of off-cut 3/4 inch plywood that made the trip with us from Minnesota, so we got crackin’.
And here they are!  Aren’t these great looking shelves?  Very sleek and modern, eh?

OK, so maybe they did need a few screws and some wood glue.

The back section of wall where these will hang spans 10 feet and 7 inches so I planned to build three shelves to cover that entire length.  The shelves rest on a mounting cleat and are attached to the wall through a second cleat at the top of each unit.

We were clicking right along until it was time to hang this third shelf…

While I had accounted for the width of the plywood in determining the height of the shelves…well, you can see that there was a slight miscalculation in the total length.

I was tempted to blame it on the difference in humidity levels between Minnesota and Colorado, much like those troublesome box lids, but somehow I didn’t think that the lengthwise expansion of plywood would fly with the super-savvy woodworking community.  Where is that boy and his coping saw when I need him?!
Fortunately I’ve got plenty of wall space to find another home for this shelf, and plenty of swollen Minnesota plywood to build another that will fit.  I think that new one will be a great place to store all of my measuring tools!

Monday, February 20, 2012

CO Workshop Update #7 - I Made the First Cut!

Paper, and fabric, and spiders…oh my!  Those are the things I found in several of the walls after pulling down some weird hardboard/granite-board type sheets that were put up by the previous owners.  It looks as though they had a make-shift office down here in the basement…hence the very un-shop-like light fixture!  I know that granite-board can be used as a writing surface for dry erase markers, so I’m wondering if the intent was to create a wall of white-board surface.  Of course, they'd have to be pretty short to write much on that lower wall below the windows. :) I’ll hang onto these panels and see about re-using them as sketching/idea boards here in the shop and in Danger Boy’s bedroom.

Pulling all these, very loosely attached, panels off the walls revealed some cheap sheet fabric and/or white butcher paper.  Not the best wall covering, especially for outside walls.  I could feel drafts coming through the walls in various spots and the plethora of spider webs and carcasses were very telling.  So after some strategic placement of insulation and some expanding spray foam it was time to get cracking on installing more of the OSB sheathing.
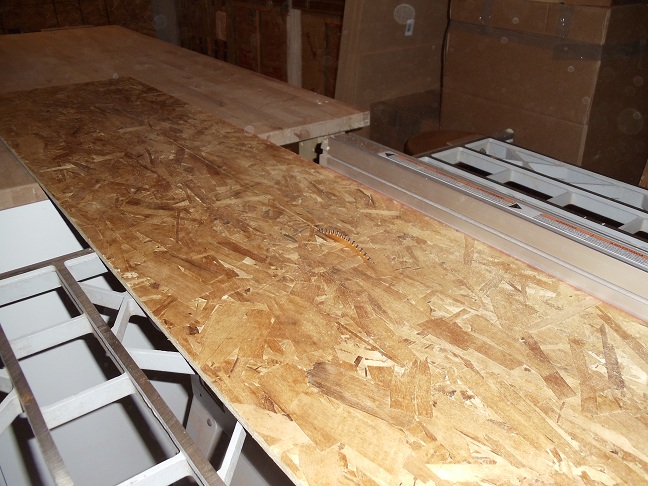
First up was to finish the small bump-out I had built around the plumbing that comes down from the kitchen above the shop.  For this step I was finally in a position to use the table for the first time here in the new shop.

I ripped the two strips needed to finish covering up the bump-out as well as a strip to cover the last seven inches next to the new basement door.

After installing those three final strips, I was able to start putting on the first coats of paint.
 
I can already tell that this is the right move for a basement shop.  Just this section of wall painted white has a pretty significant effect on the, currently, limited lighting.  Once the paint was dry I was also able to move the big metal cabinet into its final position.  Other than one of the mobile tools, this is about the only thing that will fit right into that space next to the door because of the position of the sump basin.

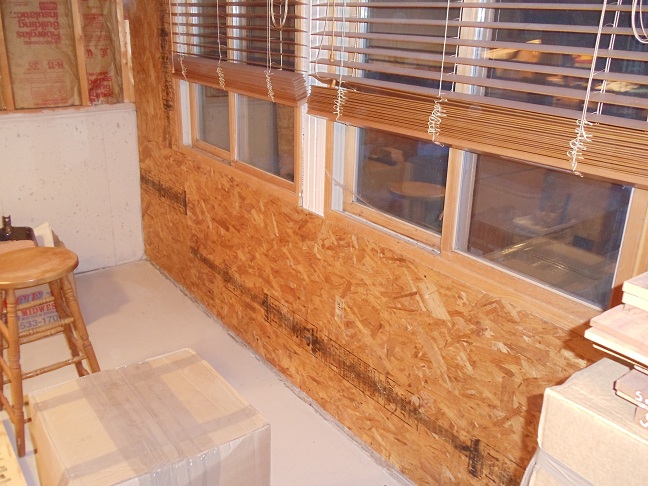
Then it was back over to that section of wall with the two windows…lots of spider skeletons in this wall!  One of the things that made this job a little easier was having the guys over at Home Depot make some of the pre-cuts for me.  Right now, to make a lot of these larger cuts requires relocating small piles around the shop multiple times…not fun.  I had them rip two sheets down to the height needed to fill in the section of wall that runs under the windows.  Then I was able to handle the smaller sections with the circular saw and table saw.

Another couple coats of paint and we have another section down.
 
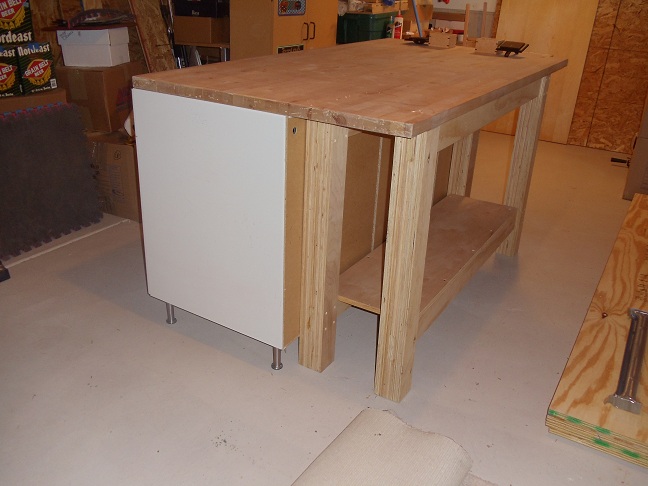
Last Fall I was able to pick up some cabinets, for free, that are just the right height to fit under these windows.  I’ll build a work surface to cover them and create a low height assembly area right next to all that natural light.  My lovely bride will also be pleased to finally get all those cabinets out of the garage!
With some good movement of those annoying piles, I was also able to clear out enough space next to the door leading into the laundry room.  I was wanting to put one of the lumber racks here since it seemed to fit and work nicely around the support column for the beam that runs along the shop.
It’s an older photo, but this is the section of wall I’m referring to.

After moving a few more…you guessed it, piles, I had a good sized section of the floor space cleared away and hit the wall with some of the white paint.  Again, big impact on the lighting! 

I went ahead and assembled one of the metal racks and set up one of the shelves to house my small metal drawer units.  These are where I keep all my planes, spoke-shaves, scrapers,  rasps, etc…mostly hand tools.

Several of the shelves are being used to wrangle some of those aforementioned piles, but will eventually be used for lumber storage.
A few “Next ups” include finishing that back area off to the side…

…setting up Danger Boy’s bench and workspace…

…and working my way down that open wall so that all the piles can be eradicated from the workshop.

As a side note, I’m actually quite pleased with the long narrow shelf that results from the steel support beam that runs the length of the shop.  It’s very handy to just stash stuff up there out of the way when needed.  In the future though, I’d like to be a bit more organized.  What would you do if you had a couple of, almost, 33’ long, and two and a half inch deep, shelves running through your shop?  Hanging clamps would be easy, but the beam runs through the open area of the shop, so longer clamps would become a painful “Wipe Out” obstacle.  And since there is nobody handing out $50,000 prizes in my basement for my ability to avoid dangling steel bars…I think I’ll pass.
Pete

Wednesday, February 15, 2012

CO Workshop Update #6

The walls continue to go up…slowly, but going up.  The challenges include having to move things around to work and having to accommodate for some “features” along the walls.
First up was to cut a hole in one of the OSB sheets for an electrical outlet.

The next hurdle was some plumbing that comes down into the basement, but sits outside of the wall…so, it’s inside the house, but outside the wall…what was that Berenstain Bears book called again?
 
To protect these pipes and maximize the wall space I measured for the shallowest frame I could get away with, without interfering with or risking any kind of damage to the pipes.  Seven inch extensions off the existing wall studs were just the ticket.  I knocked the extensions out on the miter saw and then drilled some pilot holes for the mounting screws.

Once the extensions were fastened to the studs, the stretchers went up to complete the framing.

You can see that the lowest frame is smaller due to the sump basin located there on the floor to the right.  Going all the way across with that lower frame would not allow for the basin cover to sit in place.  Another “feature” to account for…it’s like a big puzzle really!
With the workbench in place it was so nice to be able to finally set up the circular saw and guide track indoors.
 
I trimmed the OSB panel to fit the new framing, and then trimmed a small notch to allow easy access to the sump basin.

I should have plenty of space to hang things on this new wall without risking hitting either of the pipes with screws.  This panel will also be easy to remove should we need to get access to those pipes.
 
Next up will be to cut the smaller strips to close the wall in.  Those pieces will be the first cuts made on the table saw since we’ve relocated to Colorado. 
The fun is not over yet though!  Just take a look at the next little section of wall to be covered...

Here we’ve got another water line, air vent pipe, a light switch, and an old CAT-5 network connection box.  That next OSB panel is going to look like a jigsaw puzzle piece by the time it goes on the wall!  There are also some heavy electrical lines coming in behind the insulation that are making me a little nervous about just walling it all into such a tight space.  Those water lines also bulge out a bit further down the wall.  I may find myself needing to get a bit more creative than just the giant jigsaw piece.   I’m considering another bump-out frame…maybe with some integrated shelving and an access panel to the electrical and water lines.  And here I thought I was closing in on finishing this section of the wall!
I did discover a nice feature of the shop though.  That giant I-beam that runs along the length of the basement makes for a great shelf to stow all those little things that I was moving around whenever I needed to make room to work.

You might recognize some of the boxes I made last year tucked away up there.  I’ll be sending some of them off to another school fund raiser, this time in Albuquerque, NM.  Our friends run the Oak Grove Classical Academy ( http://oakgroveclassical.com/ ) and are holding their 4th Annual Growing the Grove Gala on March 31st.  If you find yourself in need of a night out and would enjoy some live music, hors d'oeuvres, dinner, and a silent auction including many pieces of art (and these amazing boxes) contact the school for details.
Pete…who just remembered, “Mama Mama!  I went to town, inside, outside, upside down!”

Saturday, February 11, 2012

CO Workshop Update #5 - In the Nick of Time

Last weekend Old Man Winter made another jaunt through Colorado’s Front Range and dropped almost two feet of snow on us here in Lone Tree.  I was able to escape the office and make it home in time to bring the table saw in from the back patio, just before the white stuff started flying.
The table saw used to sit right here, wrapped up in plastic sheeting…which actually did a fine job protecting the saw from previous snowfalls and rainstorms.   This is less than an hour after moving it into the shop.

After getting so much done over the past several weeks and creating room to bring the saw inside permanently, I didn’t want to miss this chance to bring it in without having to shovel a path.  It’s a good thing too because this is what we woke up to the following morning!

And it kept snowing all that next day, into the wee hours of the following morning.  Needless to say there was a lot of shoveling done those couple days…and maybe a few snowballs thrown.
The table saw is an older, Emerson built, Ridgid TS2424 with the Herc-u-lift caster system.  It’s a great saw.  I bought it brand new and it’s run like a champ for over ten years now.
 
The mobile base took quite a beating during this latest move, and I was actually worried that it might have been wrecked beyond repair.  The feet were also looking pretty rough.

I was prepared to add it to a claim file with the movers, however the Herc-u-lift is no longer available, so my choices would have been to make the saw stationary or steal the lift system from one of my other tools.  Fortunately I was able to repair the caster system and jury rig the feet a bit, after a quick trip to Home Depot.  I also found some replacement feet online, so I went ahead and ordered a new set.  The old ones will serve just fine for now, but I don’t have full range of height adjustment should I ever want to do any fine tuning or leveling.
With the saw safely in the workshop and mobility restored, I turned my attention to assembling my workbench.  I originally built this bench back in Albuquerque, NM.  It’s my IKEA workbench, made with three of their base cabinets and one of their Beech slab countertops.  I built a small sub-frame to support the side opposite the cabinets and installed a woodworker’s vise as well.  This thing has been knocked down and moved from NM to MN, and then from MN to CO.  I’ve been very pleased with how well these flat-pack cabinets have survived the cross country trips in moving trucks.

With the bench fully assembled and the table saw back on its wheels, it was time to position them in their final spots in the shop.  Together these two items make up the heart of the shop.  Everything else is built around accessibility to the workbench and allowing enough room to tackle large stock on the table saw.

While the ceiling isn’t near as high as the oversized garage we had back in MN, I do have more dedicated floor space here in the basement, so I was able to position the saw and bench to allow for ample space to move around the entire set-up as well as provide enough room to rip long boards and handle full sheets of plywood on the saw.
Some quick checking and tuning and the saw is ready for action.  The table and miter slot both tested out at 90 degrees to the blade, and the height of the saw landed right where I like it…just a tick higher than the surface of the workbench…even with the MacGyver action needed to repair the feet.

As I stand on the leading edge of another weekend, I’m excited to get back down into the basement and keep the ball rolling on setting up this next version of The Second Wind Workshop.  In reading some of the exploits of my fellow craftsmen and women online, I’ve found that a handful of folks have taken to calling their workshops studios.  I kind of like the sound of that too…hmmm, Second Wind Studio…maybe…  No matter what I end up calling it, we’re definitely approaching man-cave status.  A new radio for some tunes and talk radio…add a few beers to the mini-fridge and we’re almost there!
Pete