Since setting up shop almost four years ago at our home in
Minnesota I’ve made a space for our #1 son, Danger Boy. Let me tell you, there is nothing like
watching your kiddo’s eyes light up when you “get it right” with them. Between the bench I cobbled together from an
old Gorilla Rack and a generous donation of tools from Grandpa, he just went
nuts!

After just a couple short years up in the Great White North,
we packed up and moved to our current home here in Colorado two years ago. The Gorilla workbench came along with us and
fit nicely under one of the windows in our basement workshop.
One of the drawbacks of his bench is that it was designed
for a much shorter four year old. Now that he’s pushing eight, you can see that
working with a benchtop at about 20-21 inches high is getting to be a bit of a
problem.

About a year or so prior he had shut down his own woodshop
as his breathing became more and more difficult. (Please, if you’re a smoker…stop! If you need help…get it! My Dad’s last couple years were laced with
regret that he knew he would be missing so much, and we’re left with a pretty
big hole in our lives, missing our hero.)
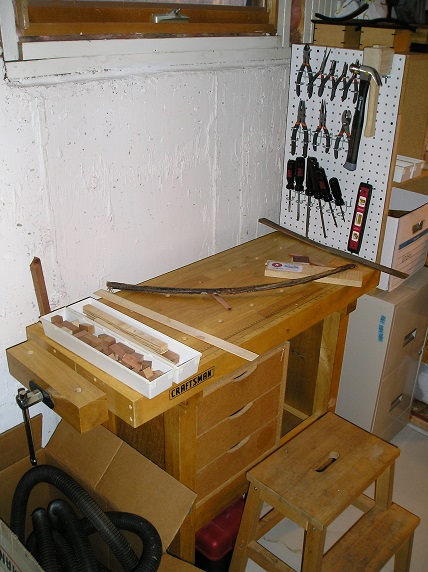
One of the items Dad earmarked for DB was a small Craftsman woodworking
bench that he had placed along the back wall under his tool rack. This last Memorial Day we made the long trek
from Maryland to Colorado and this bench was one of our pieces of precious
cargo.


About a month ago we made a few repairs to the salvaged drawer cube and box shelving unit. We placed the drawers on the bench and secured them in place with some heavy duty carpet tape, and placed the shelving block on top of an old metal filing cabinet. The boy has quite a bit of storage space with those drawers, shelves and filing cabinet now. After a bit more shop organization on my part we’ll clear out a space for him on the lumber rack as well.
A few weeks after setting up the bench we added a small
pegboard section, fastened to the side of the shelving block.

Eventually, when he’s ready, we’ll add a magnetic tool bar for some chisels and modify one of the storage cubbies to store his hand planes. A while back I picked up a Groz block plane as well as #3 and #4 bench planes for him to get started with. Now that he’s got a working vise with bench dogs we may have to start ramping up our hand tool lessons.
I get excited with every step he takes in learning something
new in woodworking, and that he seems to enjoy it so much. “Helping” my Dad was such a key set of
moments for me growing up and it’s a whole other level of joy to be experiencing
it on this side of fatherhood.
So get out into your shop and carve out that special little
space that will allow your budding woodworker to start dreaming up something
amazing. Just don’t be surprised if the
first designs involve four pounds of nails and half a bottle of glue…I know
mine did!
Pete


