The salvaged materials are all from previous projects around
the shop…pegboard, 2X4 scraps, plywood and even some acrylic paints. The only purchased materials were the cans of
spray paint. Even the plastic drop cloth
used to protect the bench was reused. Of
course there were some of the standard consumables that were already in the
shop…tape, glue, wall anchors and screws…I did reuse a handful of old sandpaper
scraps though.
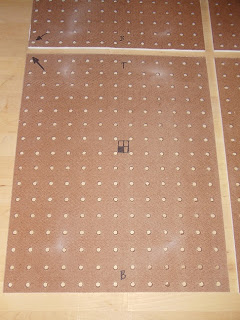
The base parts of the piece are the pegboard and thin strips
of 2X4 stock. I jointed and planed the
faces and edges of a couple 2X4 scraps and then ripped them down to these
strips on the table saw.
After cutting the pegboard panels to size and priming the
faces, I laid out the positioning of each of the four pieces and marked the
backs for future reference.
I had toyed with the idea of leaving the wood strips their
natural color, and I may do another piece with that tact, however I opted to
use some colored stain to present more energy and contrast. A quick trip to Home Depot revealed that
small cans of colored stain could be had for $12 each…what!? A quick trip back home and a few minutes on
Google revealed that I could make my own with watered down acrylic paints. So in the interest of using materials on hand…OK,
you got me, I’m cheap! The process was
actually pretty easy, and the wood took the stain quite well.
Once I was happy with the placement I taped the parts down to hold their position on the bench top.
With all of the parts secured, it was time to start getting “artsy.”
One of the processes that made this project take extra time was the painting. Because I wanted triangular forms with crisp edges only a couple of areas could be painted at any one time.
With each section I would remove the tape edges and paper about 10-15 minutes after spraying and then leave the piece to set up for a day or two. Because I would have to tape out subsequent sections over areas that had already been painted I wanted to be sure the spray paint was cured and hardened.
Once all of the sections had been painted it was time to add
the layer of the wood strips. I wanted
the strips to traverse across two, or even three, panels in some places, and I
wanted to highlight as many of the knots as I could to emphasize that this was
another material layer.
You can now see the critical role that taping the panels
into place plays in the design. Once I
was satisfied with the location of each strip I marked their locations with
some blue painters tape. I oriented the
tape to indicate the direction of each piece and marked it with each piece’s
color and whether it was laid under or over any adjoining strips.
Just before moving on to attaching the strips to the panels I had the thought that this spray paint is pretty slick (Duh!) and that the glue I was planning on using probably wouldn’t fare too well. I decided to conduct a little test first…gory details here - http://secondwindworkshop.blogspot.com/2012/10/testing-titebond-321.html
At the end the day there was no way around it…some sanding
would be required! Using the tape layout
pieces as a guide I sanded away the top of the paint layer to create a better
gluing surface.
With all of the strips in place I could now remove the panels from the bench top and trim all of the overhanging pieces. My little Japanese Dozuki was just the ticket.
The drop cloth actually looked a little “artsy” in its own right.
It did go on to serve another purpose though, as a layout guide for where to place the wall anchors.
I decided to hang these panels using French cleats. I attached the cleats at the top side of each panel and added a little offset strip at the bottom.
Because the positioning of each panel, in relation to the others, is so critical I used wider cleats to allow for some side to side play, and cut these vertical slots into each one to accommodate any adjustments up or down that might be needed.
All in all, I’m pleased with the piece. I think having it take so long (more from having a day job than anything else) had me “getting used to it” if that makes any sense. There were many lessons learned along the way and I could point out all kinds of things I would do differently or challenges I ran into that required some kind of fix, however, in the words of woodworking great, Jim Heavey, I’m just going to “shut up.”
Pete


No comments:
Post a Comment