Allow me to take a little step back on the design process for this project. Previously, I spent a fair bit of time mulling over different inspirations for the lids to these Birdseye Maple boxes, and then really got a hankerin’ (yes a hankerin’) to try some bent laminations. I had a design sketched out, measurements decided upon and a method of joining the handles to the lids determined…and then I pitched all of it out the window when these new designs struck me.
I was traveling home from a business trip and had my sketchbook handy on the plane. I opened it up and noticed a handful of quotes I had jotted down on the inside cover…”Never stop designing”, “Draw everyday”, “Go out on a limb and enjoy the risk”, and “Don’t come out of the sketchbook too early.” All quotes by famed designer Wendell Castle. Here’s another shout out to Neil Lamens over at Furnitology Productions (http://furnitology.blogspot.com/) for the great interviews he conducted and shared back in 2008 (May, June and July.) You can catch those interviews with Wendell Castle over at Neil’s site.
While I was excited to try the bent laminations for the first time, the more I thought about it, I just wasn’t very enthused about my original design for the lid handles. You may recall…

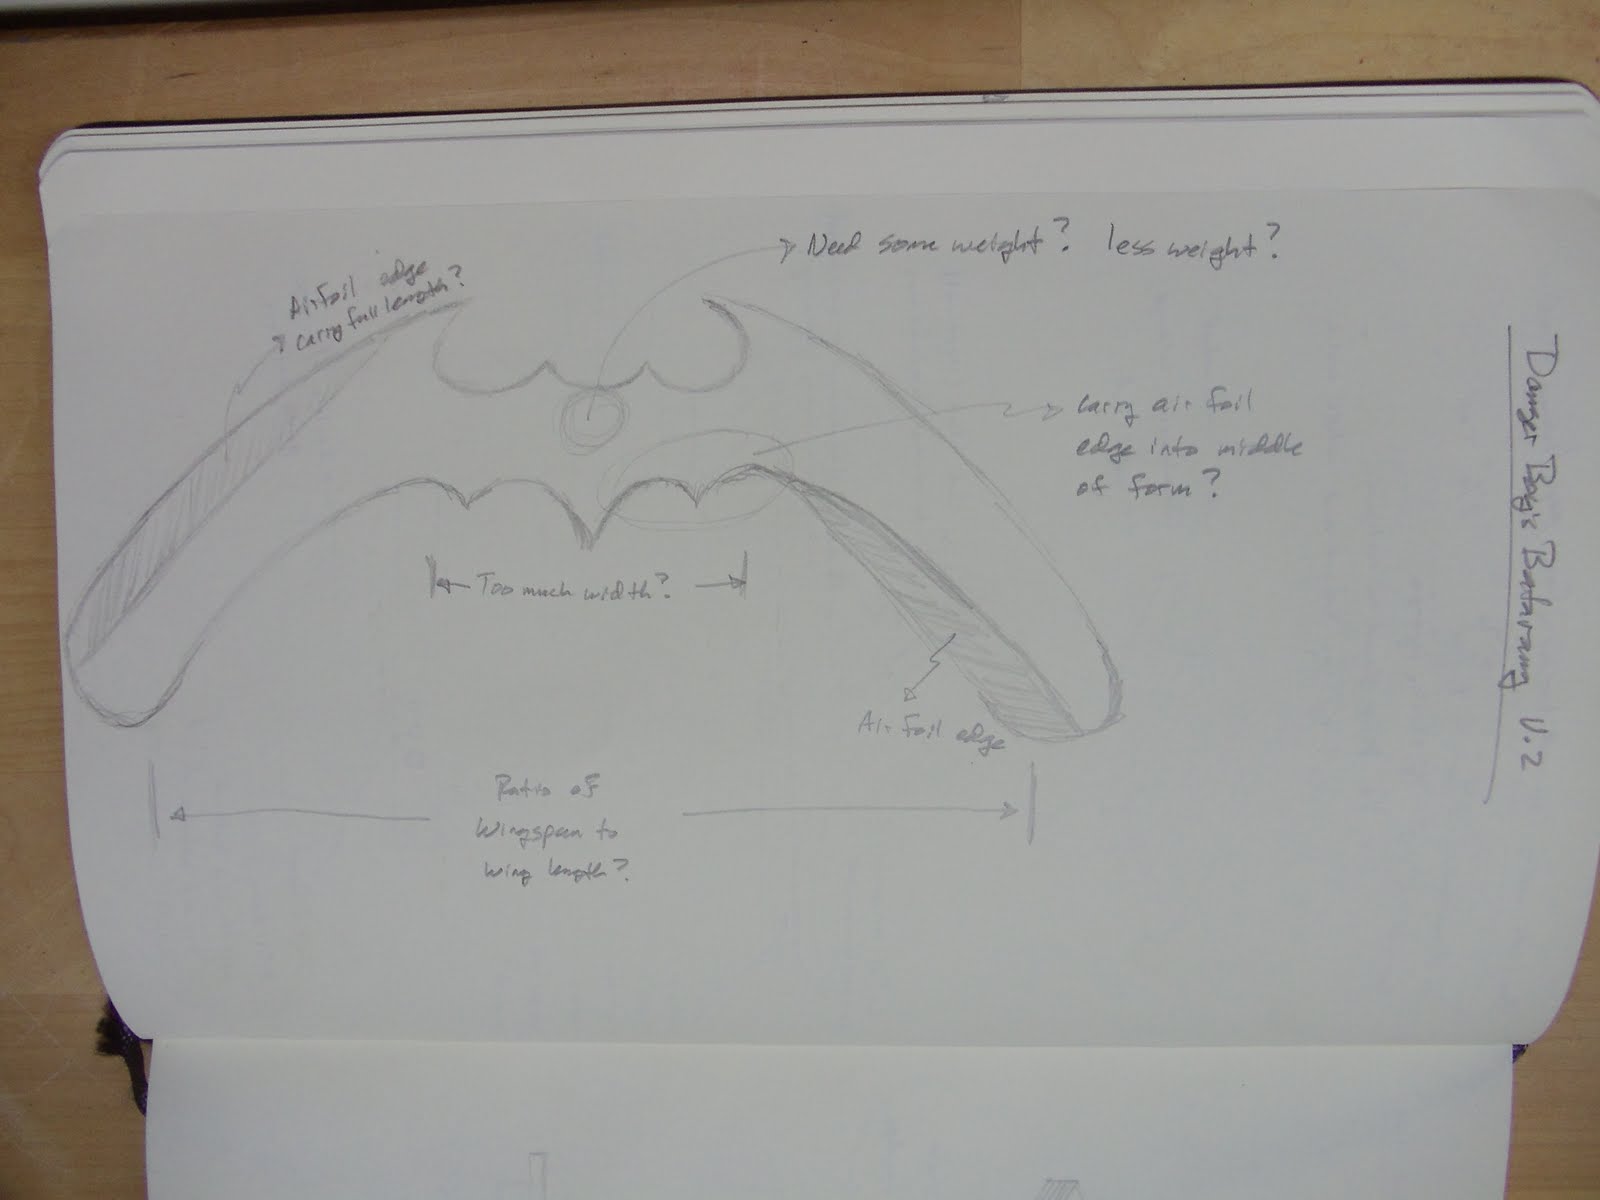
So...while winging my way back to Minnesota, I started playing around with a few ideas on paper. Prior to the trip I had been tinkering in the shop and was turning the bent arcs at different angles, overlapping them, flipping them upside down…just letting my imagination run with the forms. After stewing on these thoughts for a few days, I started putting some new ideas to paper.
I ended up sketching almost a dozen different variations of the handles and their placement before landing on the two that really spoke to me. I really enjoyed the entire design process and while there is something I would change (in the design of the actual box) I’m really pleased with the way these turned out. I’m already chomping at the bit to start some new projects!
Thanks for indulging my thoughts on the design process. Now on to putting a lid on these…well, lids.
After gluing up the Wenge slabs I decided to route a lift on the underside of the lids to soften the form a little. I opted for a chamfer to match the profile at the bottom of the box.

Because I decided on the chamfer after gluing the lid pieces up, I had to raise the bit quite a ways to reach the edges to be routed.

In hindsight, I should have routed the profile before gluing the pieces up as I could have risked some significant chip-out. Fortunately they came out quite nicely.

When the routing was done I gave both the lids and the boxes a thorough sanding on the half-sheet pad sander.

With all the parts sanded and prepped it was time to move on to assembly. Since the handle for the first box lid was going to be attached upside down I decided to pre-finish those parts that would be hard to reach after the handle was joined to the lid. The blue tape protected those areas designated to receive the glue.


Once the glue was applied I fastened the handle to the lid with a single screw. This screw acted as a clamp, holding the pieces together while the glue cured and allowed me to set the handle square to the lid’s edge before tightening it down.

After the glue had set, it was on to the drill press to do something about that screw hole. Believe it or not, the drywall screw was not part of the design!

What’s the best way to hide a hole? Make a bigger hole!
And how do you deal with a hole in your design? Drill two more holes right next to it!
Actually, those holes were a planned part of the design…one to hide the use of the screw and two more to create some interest in the surface of the bent laminate handle. With the screw removed, I drilled holes using the Miller Dowel step bits to receive one Standard and two Mini, Birch Miller Dowels.

The dowels were then glued into each hole. I hadn’t originally planned to run the dowels all the way through the lid, but I really liked the look of the three circles in a line, so I carried that through to the bottom of the lid.


My Japanese flush cut saw did a fantastic job of removing the dowels from the bottom of the lid. I had to turn to the band saw to trim the dowels from the top though since the handle presents a pretty tightly curved surface that didn’t play well with the handheld saw.


I had thought to build two of the same lid designs, however, because I “don’t come out of the sketchbook too early” now, I had continued to play with some more designs and decided to do something that would highly contrast the first lid to create some interest when the boxes are displayed together.
For the second lid, I laid out some placement lines and chiseled away two gaps into the sides where the handle would be seated. Pre-scoring the lines and a sharp chisel were critical here. The Wenge is very hard and brittle and since it’s quartersawn those long grain slivers can really take off on you if you’re not careful.


Since the handle won’t be attached symmetrically across the top, the two gaps required quite a bit of testing and adjusting to account for the slight variations in angle and length on each side. The handle is designed to hang over one side of the box about twice as far as the other side.
The glue-up was much simpler on this lid since the chiseled gaps contained the handle pretty snuggly.

Then it was back over to the drill press to tap the holes for the dowels.

Here are both lids, completed, with a wipe down of mineral spirits to clean any dust out of the pores. I opted to go with Walnut dowels on the second lid to further accentuate the contrast between the two.

The two additional walnut dowels were added to emphasize the extra length of one side over the other.
Here we have both completed boxes displayed together. The many contrasting variations between the lids really set the two boxes apart, even though they are identical. The key concept was to take the two, very symmetrical and functional boxes and use them as a base for the display of an artistic form.


Both handles display a piece of Padauk with a combination of heartwood (rusty red) and sapwood (cream colored.) This layer of the lamination is somewhat hidden on the box with the upswept handle until you lift off the lid. Combined with the three Birch dowels that penetrate the lid, I like to think of it as a little surprise that isn’t revealed until the box is opened.


On the second box, that heartwood/sapwood layer is prominently displayed. It’s a little tough to see in these photos, but the cream colored sapwood actually has some light spalting that left some very fine “ink-line” patterns in the grain. I was very fortunate to come across this slab of Padauk a few years back, especially since the spalt lines weren’t reveled until I was cutting the strips for the laminations.


The bottom of each box received a layer of black felt. It’s interesting how the felt changes the sound when removing or replacing the lids. Without it, the hollow sound is quite loud and sharp. While it will help protect anything stored in the box, I like the way it changes the overall experience with the piece.
I’m calling these boxes “Form Over Function” as the artistic design form sits, literally, over the functional part of the pieces. I mentioned that there was something I would have changed about the boxes themselves if I could go back and redesign them. I’ll hang onto that tidbit of info and incorporate it into a future expansion of “Form Over Function.” I’m just not ready to confess yet! J
Pete