It’s a double post weekend! After a couple weeks in the single digits and below zero, it was good to get back out into the shop…and boy did I take advantage of it.
The first order of business was to mill up the stock for this next run of boxes. After jointing a square edge on each board I planned all the box side and lid stock to thickness using the planer/vacuum set-up that I prepped on Friday night.

I used a handy Craftsman Tool switch that allows the vacuum to be linked to the start switch of the planer. When the planer is turned on, the vacuum starts automatically, and then switches off when the planer is shut down, with a five second delay to finish drawing any dust and chips.

I collected the planer shavings in a trash bag for use in a future project.

Not a bad pile of lumber after all the work!

I jointed one face on each of these pieces of Marblewood and Bubinga, however, not all of them were able to retain a full 3/8 inch thickness. I would actually have needed a little more than 3/8 inches to get at least one pass in the planer. I’ve got some other ideas for these, so back on the rack they’ll go for now.

I had these two Padauk boards set aside as well. They had already been face jointed and planed to thickness, so they just needed to be ripped down to size.

I jointed one edge…

…and then ripped the boards down to size. The solid heartwood boards (all red) are ripped to a final width of 2 and 1/4 inches, while the boards with the heartwood and light sapwood were ripped with some extra width to allow for some resizing later.

While setting up the miter crosscut sled, I found that the Oak runners had expanded slightly since our move from New Mexico. I had to make the same adjustment on another crosscut sled several months ago, so I turned to the trusty Stanley no. 92 Shoulder Plane. Just a couple passes on the outside of each of the runners made for a good fit without impacting the fit of the runners between the miter slots on the table saw.
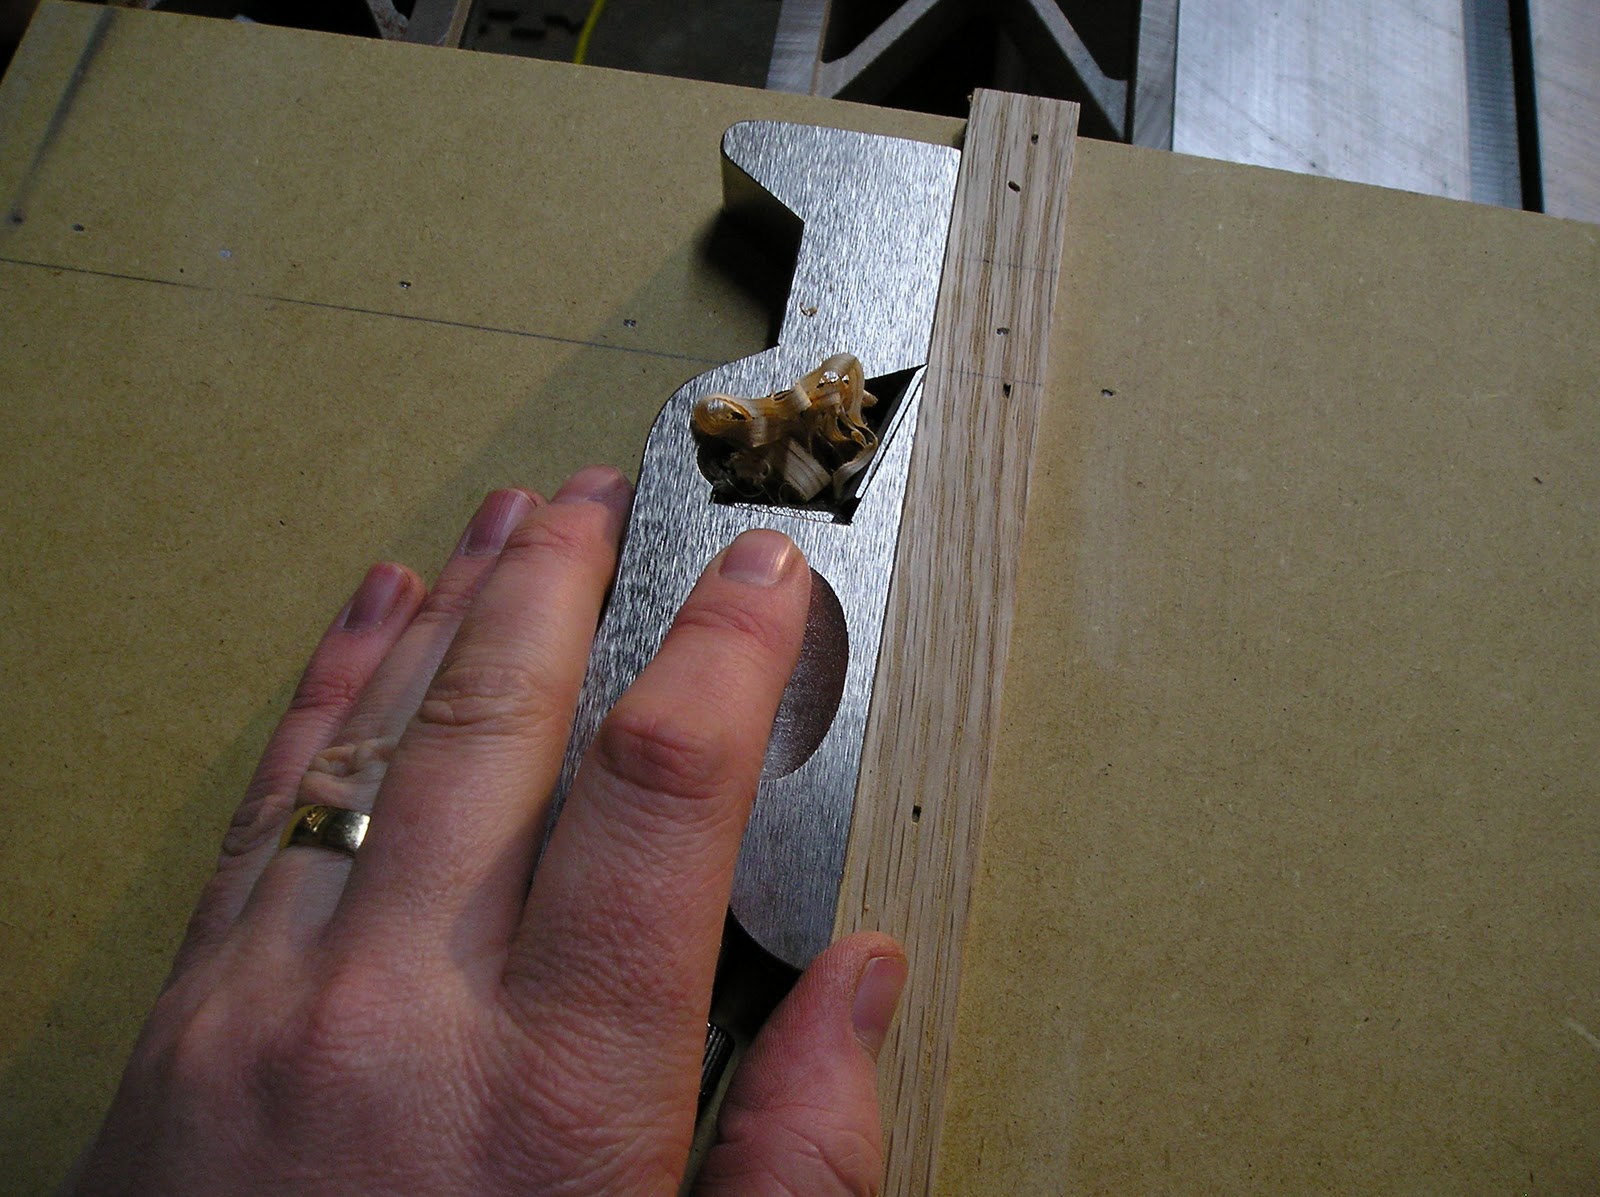
A coat of paste wax on each runner, and the sled was sliding like silk, with no slop or rocking.
Once the sled was good to go I selected an extra piece of Cherry to test and tune the set-up. I marked one side so that I could track the process of cutting all four sides.

I designated the marked side as the outside of a box. The process starts with putting the inside surface face up and trimming the first 45 degree cut on the end of the board.

For the set-up I’m looking for three inch long sides, so I marked a reference line three inches in from the newly trimmed end.

I then flipped the piece so that the outside surface is facing up and used that reference mark to line the piece up with the saw kerf on the rear fence of the crosscut sled.

Once the piece was lined up I clamped a stop block to the fence.

Now all the parts cut against the stop block will be exactly three inches long…or, at least, exactly the same length!

After cutting a box side piece, the board is flipped so that the inside surface is facing up again, and the end is trimmed again to realign the miter cut.

Then the board is flipped again and moved over to the shop block to cut the next piece.

I call it the “Trim, flip, cut, flip, trim, flip, cut, flip, trim, flip, cut, flip, trim, flip, cut” method. Maybe I need a shorter name.
After all the flipping and cutting is done, I’m left with four sides that have a grain pattern that flows around the corners of the box and these little triangular off-cuts.

Believe it or not, I’m saving these little pieces for a purpose…another second wind aspect to the project.
Once all the sides were cut, I tested a dry fitting of the pieces for square. All four parts lined up beautifully and the machinist square told a great story. Those are some sharp 90 degree corners.

After a successful test I started cutting parts. I labeled each piece with a box number (left corner) and numbered each of the four sides in order (right corner.)
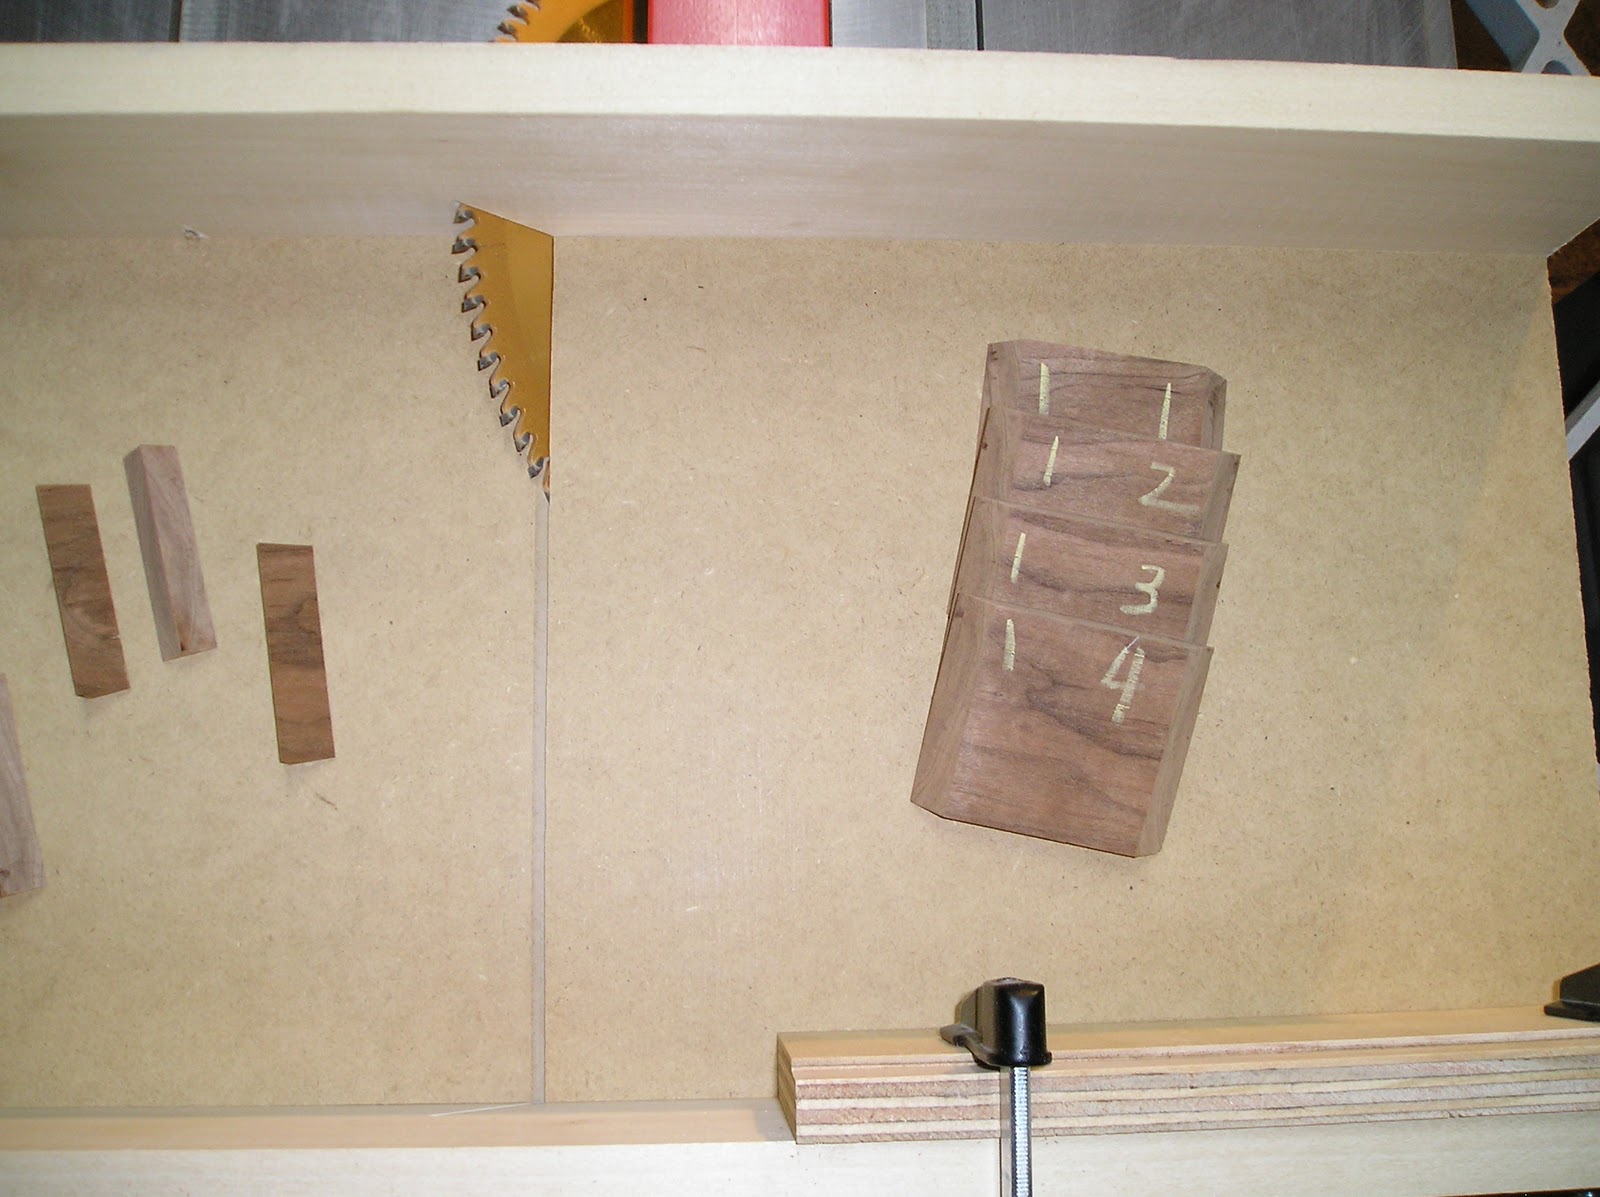
Now for a look at those Padauk parts up close. You can see how that heartwood/sapwood transition will flow around the corners. By leaving these parts a little oversized I’m giving myself some room to trim from the top or bottom of each piece to ensure that the transition line flows around all four corners of the box.

And here we have the whole gang all together. That’s 34 boxes waiting for the next stage.

There is only one thing that this many box parts could mean…that there is a lot of sanding in my future!
Remember those little triangle bits? I set aside a small pile of them…some from each wood type.


Many of these boxes will have triangular keys in the corners and these little guys will be perfect to trim those pieces from.

Next weekend’s forecast…33 degrees on both Saturday and Sunday. Looks like we’re headed toward getting back on track with the project list in the Second Wind Workshop! There are a couple of Stars games though…hmmm, if it’s not the cold it’s the hockey!
Pete
No comments:
Post a Comment