After last weekend’s Woodworking Show I finally got around
to installing the Carter guide system (that I bought a couple years ago at the
show in Minnesota!) on my Ridgid 14” band saw.
Before…

Before…

Before…


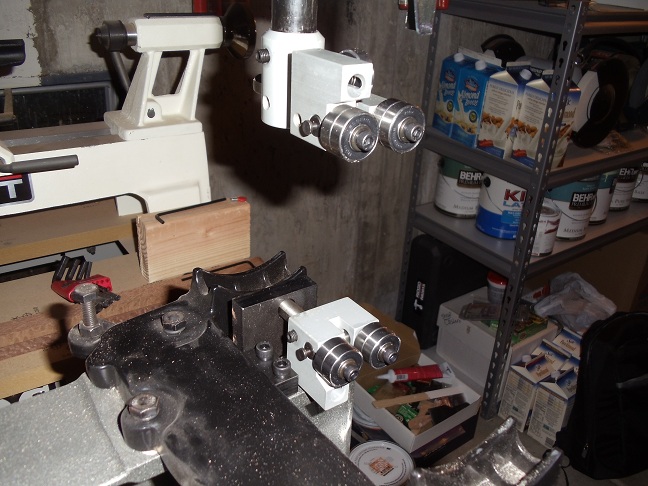
After…

1.
The deepest point of the teeth gullets should be
on the center of the wheel. This places
the point where the cutting occurs at the pivot point of the crown of the
wheel. I had been putting the center of
the blade at the center of the wheel, maybe even a bit forward of that, which
allows the blade to pivot at the back half of the blade. Can you say drift!?
2.
Tension the blade properly. You should get no more than 1/8 to 1/4 inch
deflection in the blade with a light tap of the finger on the side of the
blade. You should also remove/lessen the
tension on the blade between uses to extend the life of your blade.
3.
The side guides should be set to about 1/16 inch
behind the deepest point of the teeth gullets.
This will protect the set on your blade’s teeth and reduce heat build-up
while running the saw.
4.
The thrust bearing should be set just behind the
blade so that when the wheels are turned there is no contact with the bearings
(at all) until some slight pressure is applied to the front of the blade. Those bearings should only contact the back
of the blade when you’re actually cutting.
5.
The side guide bearings should then be set as
close to the blade as possible without touching. To keep heat build up to a minimum you do not
want your guides in constant contact with your blade. Heat is the enemy of your steel blades.
6.
Square the table. There are many ways to check for and ensure
square. Unless you’re looking for an
angle or taper…this step is worth doing every time you set up your saw for a cut.
Alex and his Dad will also take time to talk with you about
any band saw issues you’re having and will probably pull you over to one of the
demo saws to walk you through any concerns or troubleshooting right then and
there. A class act, those two!
After hitting all six points it was time to fire up the
saw! I set up the Mag Fence for a thin
resaw cut…something I knew I would not have been able to do with my previous
set-up.


I didn’t chose a particular measurement, but cut #1 came off at 7/64 of an inch, and was a uniform thickness the whole length of the piece.

I moved the fence in a little closer to the blade and ran it through again. No rejoining of the face…I just ran it through with the mill marks from the previous cut. Cut #2 came off at 3/32 of an inch. Again, very uniform in thickness.

A little closer…cut #3…1/16 of an inch.
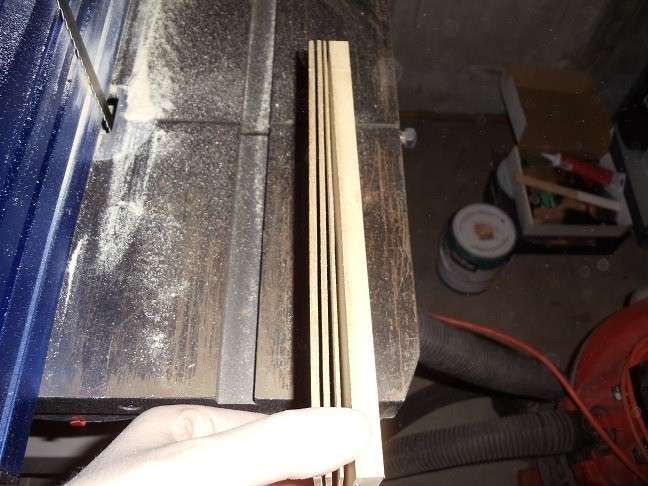
Closer…cut #4…3/64 of an inch.

OK…just a little closer…cut #5…1/32 of an inch.

At that point I had reached my limit of comfort without a sacrificial face surface on the fence.

The last couple of pieces showed some variation in thickness…less than 1/100 of an inch, but that may be due more to the rough sawn surfaces being used to register against the fence than the accuracy of the set-up. A different blade might also yield some tighter results.

Overall, I’m incredibly pleased with this set-up. I had been resawing free-hand up until now because I could do that more accurately than using the old fence, and even then I had to give myself a margin of error for thickness variations caused by what I now know to be deflection of the blade.
Next up for the band saw is the addition of the Carter
Stabilizer…also sitting amongst my tools for the last couple of years.

Here’s a demo that Alex does with the Stabilizer, cutting a
reindeer out of a 2X4.
I think I’ll just start with some simple band sawn
boxes for now. If I tried that as fast as he
does, you’d be calling me “Stubs!”
Pete (Keeping all 10 fingers!)


2 comments:
Pete,
Looks like a very worhtwhile upgrade to the same damn saw I have. Could you tell me which model carter guide blocks you used for the Ridgid?
Dyami, mine are a couple years old now, but all the packaging looked the same at the last show here in Denver. The guide kit model is JET 14 (14" Jet band saw with round post.) It lists fitting quite a list of 14" saws including the Ridgid. It's compatible with the Stabilizer CTR1 if you're looking at that as well. I don't remember what I paid in total, but picked up a combo of the guides, stabilizer and the Mag Fence (this is an old model...newer one has the Mag switches now.)
Post a Comment