“The rabbit-hole went straight on like a tunnel for some
way, and then dipped suddenly down, so suddenly that Alice had not a moment to
think about stopping herself before she found herself falling down…”
It’s a good thing these chair parts are relatively small…15
or 30 mm isn’t really all that far to fall.
Of course we did just have a close encounter with the fourth dimension recently,
so you’d better wear your aluminum hats for this one just in case.
This step in the Red and Blue Chair build reveals what is
probably my most significant deviation in construction from Rietveld’s original
plans. The recommended size of the dowel
stock for the joinery is 15mm wide, and I was originally planning to use some
standard 5/8 inch Poplar dowels from Home Depot. The dowels I brought home did not fit well
into the 5/8 inch test holes I had made in a scrap piece of the Beech though. After mistakenly drilling a 3/4 inch test
hole as well, I decided to take the test piece on the road and find the perfect
fitting dowels once and for all!

The logical part of my brain (not the one conjuring
comparisons to Alice’s Adventures in Wonderland obviously) was telling me that
these 3/4 inch dowels would provide plenty of strength in the chair’s joinery,
so with purchase in hand it was back to the shop…which just so happens to be
down in a hole…I mean basement!
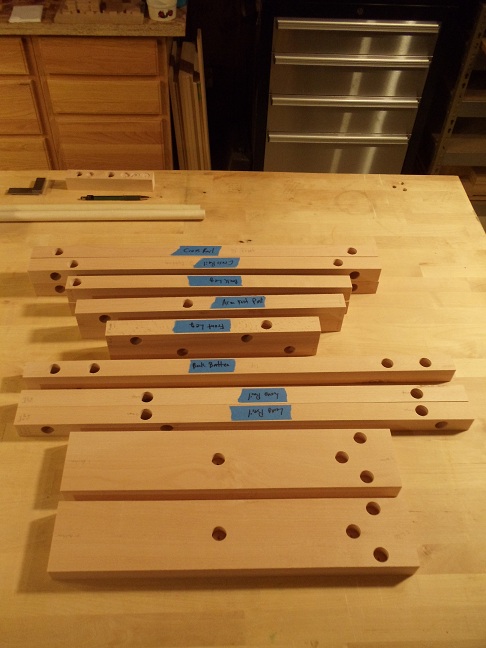
Back in the shop it was time to get to drilling. I used one of the chair parts to set the
depth of the holes on the drill press. I’m
shooting for half the width of the stock, so I scribed a line at the center
point, lined up the bottom of the Forstner bit, and locked in the depth stop.


Only the stop block had to be moved to accommodate the location of the various holes along the length of the pieces.
After a couple hours (drilling, moving the stop block,
lunch, change a poopy diaper, drill, move the stop block, drill…) all of the
parts for both chairs resemble Swiss cheese and are ready for the next step in
the joinery process.

Fortunately I’ve recently added a new tool to the shop which
will greatly enhance my ability to focus and strategize.

Pete

2 comments:
Nice!, I am also planning to make one very soon. You made a good decision to go for the 30x30 milimeter size. I read a book and saw a documentary about this chair(in dutch language), the thing is that Rietveld made earlier versions of different sizes (24x26) (27x27) also the sitting and back plate were different. In all there are 4 kinds of this chair before the final design from 1925. I do have a scan of his original drawing (made in 1950). Rietveld wasnt that precize in woodworking, he always loved to make things as easy to produce as possible, preferably out of a machine by pushing a button! :D
Great info Achmed! My sister gave me a book of his designs a couple years ago and I'm using his original plans (after years of revisions, it sounds like.) The book lists several of his customers that he built these chairs for and they all have different measurements, customized for the recipients.
Good luck on your build!
Post a Comment