My plan to spend some time in the shop last weekend was crushed under tons of snow, much like the home field of our Minnesota Vikings, the Metrodome. Well…that and the -2 degree high for the day…Brrrrrrr! I am, however, the proud owner of almost two full feet of snow in our yard and walls/drifts pushing five feet high in some places. It’d be great to save all this precipitation until it’s time to water the lawn, but we don’t have that many Tupperware containers.
It’s a week later now and almost 20 degrees warmer. With no snow to shovel, it was time to get back out into the shop. I fired up the garage heater last night before going to bed to get a head start on warming the space up.
The last few tasks on the Zebrawood boxes involve adding some of the details. I added a 9 degree bevel to the lids and cut a small 45 degree chamfer around the bottom of the boxes.
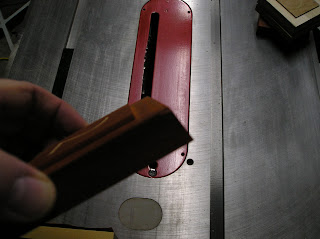
First, I switched out the table saw insert. I didn’t want to cut into the zero-clearance insert so I installed the original to allow for tilting the blade.The next step was to set up one of the miter gauges with a stop block and make some test cuts.
The key is to trim the 9 degree bevel right up to the top edge of the lid so that the dimensions don’t change. If the trimming passes removed any width or length from the top of the lid the shape of the lid would change when trimming each edge.
This little space heater made a big difference while working in the shop. The bigger ceiling mounted heater takes off most of the chill, but having this small heater to move around to where I’m working made things much more comfortable.
When cutting the lids it was important to make the cross-grain cuts first. This picture isn’t the best, but you can see a small chip-out at the corner.
Making the long-grain cuts next removes the chipped out corner.
Once the set-up was fine tuned trimming all four lids only took a couple of minutes.
It was then time to set up the router table to trim the chamfer profile around the bottom of each box. I’m using a 45 degree chamfer bit here with a guide bearing. The bearing allows for cuts that follow the shape of the box without having to use a fence to guide the work over the bit.
I made a pass with a test piece. I’m just looking for a small chamfer to create a little shadow line around the bottom of the box.
Once I was happy with some smooth test cuts in some scrap, I cut the profiles on the boxes.
With the lids finished and the chamfer details added, the construction of the boxes is complete. All that’s left now is some final sanding and to apply a clear finish.
I really enjoyed building these boxes and will definitely make more of this design. I’ve been kicking around a few variations that I’d like to experiment with. The set-up of the various steps to complete these boxes were good skill builders and challenged me to consider solutions to ensure accuracy and safety while working. The next batch of boxes will be a larger run. Once each process is set up, it’s just as easy to cut the parts for 100 boxes as it was for four. If only it were as easy to fix the Metrodome!
Pete


No comments:
Post a Comment