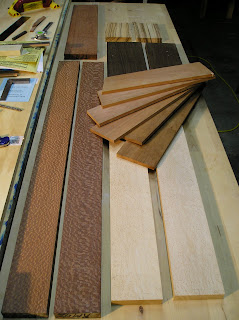
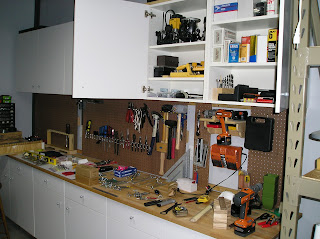
It was a balmy 11 degrees here in the Twin Cities today…before wind chill. Luckily there is no wind ripping through the workshop, so the heater was able to get us up to about 30-35 degrees after a couple hours of run-time. The electric portion of our utility bill is almost double what it was last year at this time, so quality shop time may be a little harder to come by for the next month or so. I did brave the cold for a couple of hours though and kept the next batch of boxes moving forward.
The boxes call for a height of two and a quarter inches, so all of the stock was previously ripped to two and half inches wide.
Today’s task was to resaw these slabs in half to produce boards 3/8 of an inch thick. In the past I’ve relied on my band saw for any resawing, however, I’ve not had time to tune it up or install the new Carter guides, so I tackled these with the table saw. This was a good exercise as I’ve never resawn on the table saw before. It’s always been my Dad’s preferred method, and Doug Stowe uses the table saw in his book as well.
I swapped out the blade from the 50 tooth combo to the 90 tooth finish blade. Both are thin kerf, but the 90 tooth leaves a smoother finished cut.
The two Lacewood slabs were a bit longer than I felt were safe to handle in resawing on the table saw, so I cut them down in size.
Before slicing the slabs down I needed a flat face and square edges to ensure even, consistent cuts. That’s a job for the jointer.
I ended up spending about 20 minutes doing some fine tuning on the jointer before I could proceed. I’ve moved it several times over the past few months, so I wasn’t surprised to find it needed some attention. Once the tables and fence were dialed in, I was in business. I flattened one face and then squared both edges.
You can see a significant difference in the jointed face and the other rough sawn surface. That smooth face is what will be referenced against the table saw’s rip fence.
It was then on to the set up of the table saw. All of the slabs are about two and a half inches wide. While the table saw is capable of cutting through more than two and a half inches of material, it just felt a lot safer to make the cuts in two passes. This is the same method that Doug Stowe describes in his book. I am tempted to try it one pass though…maybe next time.
I started by placing a mark at a little over half the width of each slab and then using that mark to set the blade height on the table saw.
I then set the width between the blade and the fence to a little over 3/8 of an inch. This will allow for a little extra material that can be removed when truing up the surfaces and thickness.
The first pass will cut through a little more than half of the material, and the second pass will finish the separation completely.
I used a piece of plywood as a backer/push stick. It’s tall enough to keep the full height of the blade contained as I push each slab through the cuts.
OOOPS! I must have missed working with one of the Lacewood slabs over on the jointer. This is what you get if both edges are not squared to the flat face that runs along the rip fence. You can even see that the bottom edge (where my thumb is) doesn’t look square to either face of the board.
Most of the slabs yielded two boards that were over the targeted 3/8 of an inch thick.
Now that all the slicing and dicing is done I’ve got enough for quite a list of future boxes. After another shop session with the planner and the jointer we’ll have enough stock for 25 of the Stowe design boxes (eight Lacewood, seven Wenge, one Zircote, six Cherry and three Bird’s Eye Maple.)
The Bird’s Eye Maple yielded two boards that were slightly under the 3/8 of an inch target, so those two boards (shown in the photo on edge) will be saved for another design.
At this point the excitement of being out in the shop was waning with the dropping temperature. It was time to call it a day and retreat to thaw my fingers out again. Yep, all ten are still there. I think we’ll call this resaw exercise a success.
Pete


