Pages

Monday, November 29, 2010

Put a lid on it!

This afternoon I worked on fitting the lids for the Zebrawood boxes.  The design calls for a rabbet around the bottom surface of the lid which forms a relief to fit into the opening of the box.   I began my session in the shop by measuring the inside dimensions of each Zebrawood box.  Much to my dismay many of the measurements showed some variation!  OK, so it was only a 128th to a 64th of an inch…but still!
Knowing that the boxes had some slight variations, I cut up a stack of test lids from some birch plywood scrap.  By the time I was fitting the second lid I realized that a test piece for each box was overkill, but the process was a good experience in setting up the operation.

Once I organized all the measurements and test pieces I set up the table saw for the rabbet cuts.  I switched out the thin kerf blade for the wider Oldham blade.  I want the relief on the lid to have some heft so the wider blade will allow for a deeper rabbet around lid.

These lids will be run over the blade and along the rip fence so I used a zero clearance insert to maximize the surface around the blade and reduce tear-out.

These are some touchy cuts so safety is a significant consideration.  They could be cut without any form of push stick since these aren’t through-cuts, however the blade is exposed on the outside of the cut and the distance to my fingers would only be a couple of inches.  I used a length of plywood scrap of the same thickness as my test parts and lid stock to push the pieces through the cuts.

When cutting the rabbets into the lids I left them just a little proud of the inside dimensions of the boxes and then fit each one with a sanding stick.  The idea is to get a snug fit so that the lid doesn’t rattle around, yet can be placed and removed easily.

By the end of today’s stint in the shop I had all four lids fit to their boxes.

The next steps will include cutting an angled profile around the edges of the lids, cutting a small chamfer around the bottom of each box, some final sanding and a clear finish.  We’re almost ready to call these a wrap!

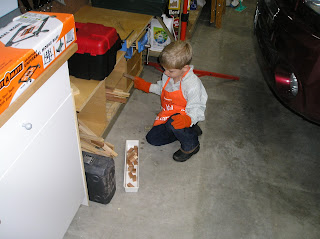
While I was working on the lids Danger Boy was working on some much needed organization of his workshop area.  He cleaned up his wood collection to make some room for his new toolbox.  Things actually take a little longer when he comes along to “help” but you can’t imagine how great it is to hear this little guy come running every time I mention going out into the shop.

Pete

Friday, November 26, 2010

A Little Trip Back in Time

I’m hoping to finish up the lids for the Zebrawood boxes this weekend and thought it might be a good idea to post on the previous work it took to get them to where they are now.  I had chronicled the process on my facebook page some time ago, back when we were living in Albuquerque, NM.  The unfinished boxes had been stored away in a box of several small projects that were in the works when we packed up to move to the Land of Frozen Tundra…or 10,000 Lakes as the locals like to call it. J
The following is a catch-up post to bring you up to date on the project.  These boxes are a Doug Stowe design from his book, “Basic Box Making.”  His design calls for decorative pegs or splines, however this Zebrawood has so much interest in the grain pattern I thought they might make them look too “busy.”   I’ve got plans to do more of these boxes in Oak, where splines or pegs would really add something to the look and feel.
I took a lot of queues from Doug’s book.  For those of you who’ve read it you’ll see several familiar things…starting with the miter sled for the table saw.
Each box side was cut to size with mitered corners on this new sled.

I invested a lot of time fine tuning both the sled and the saw settings which yielded some very nice results.  Square corners are a thing of beauty…if that’s what you’re shooting for.  (Note:  Next time I use this sled I’ll probably have to make some tuning adjustments.  There are some pretty big differences in temperature and humidity between New Mexico and Minnesota.)

After cutting all the side parts for four boxes, it was on to cutting the grooves to receive the box bottoms.  It was critical to mark the pieces with an orientation mark and box number so that the grain pattern flowed around each corner.

Once the grooves were done I cut the box bottoms from quarter inch Baltic Birch plywood.  This stuff is really nice to work with and will provide a very stable bottom for these boxes.   After cutting the pieces to size I cut a rabbet around to bottom of each one, to fit them into the grooves on the side parts.

With all the work complete on the side pieces, it was time for some sanding.  It’s much easier to sand the inside of a box before it’s a box, so I hit each part, front and back with my half-sheet pad sander.  Doug Stowe inverts his on his bench and holds it down with a sand filled inner-tube.  I built a wacky looking jig that can be clamped to the bench top.

Once all the parts were sanded and cleaned up, it was time to assemble the boxes.  I used blue painter’s tape to line up each part and fasten them into a row.   The key is to line them up as straight as possible and to apply the tape with a taut springiness at each corner.  I like using this tape as it holds really well and has a slight stretchy quality.

With all four boxes taped up and ready to go it was time to apply the wood glue.  The small applicator bottle with needle is another Doug Stowe recommendation that I adopted.

It was then time to insert the bottoms and “roll” each piece up.  You’re looking for a hint of tension at each corner as you pull it all together.  This ensures you’ve got a tight fit.

When all four sides have been rolled together some more tape at the closing corner holds the whole box together while the glue dries.

Once the glue had set, it was time to peel all the tape away and clean each box up on the sander.

Then you can pack them in a box, move across the country, pull them out a year later, and then finish them up.  I don’t know why, but Doug failed to include this step in his book.
You can catch up on the steps that followed in a previous post, “How to Clean a Zebra.”  http://secondwindworkshop.blogspot.com/2010/11/how-to-clean-zebra.html
Pete

Wednesday, November 24, 2010

Any Excuse to Hit the Shop!

The last couple weeks have been pretty busy with the day job, so shop time was pretty limited.  I’ve been able to get out there for a few minutes at a time to tidy up or tinker with the “Lego” pieces, but that was about it…until last night!  While eating dinner with our visiting family from Colorado, disaster struck!  Joint failure on one of our old 60’s Danish Modern dining chairs, in two places even.  I sprang into action like I’d been training for this moment all my life.  My mind raced, “This will require a drill, clamps, wood glue and even a chisel for clean up!  Yay!...uh, I mean, oh what a shame!  We really like these chairs.  I’ll have to see if I can fix this tomorrow morning honey.”

I gently placed the patient on the examining table to survey its wounds…a total collapse of the left side supporting structure.

Upon closer inspection…ah ha!  This patient has been operated on before, and it doesn’t look like a licensed professional did the work.  It’s a good thing I’m here!  The rear joint has no signs of any glue at the joint or on the dowels and the front joint at the cross-bar looks like it was repaired with half a bottle of Gorilla Glue!

After removing the seat, a lot of chisel work was required to remove an almost eighth inch layer of the old polyurethane glue foam.  Not pretty!

I was able to chisel away most of the crud and then some sanding was needed.

Once the joints were cleaned up, the handy dandy squeeze bottle made injecting glue into and around the dowel holes and on the dowels a breeze.

After the glue-up it was time to lock it all down.

That front joint (the one attacked by the gorilla) was still giving me some trouble.  There must be a little sliver or chunk of the old glue that I missed because I couldn’t get the joint to close completely.  I really torqued down on the joint with two clamps to pull it as close as possible, but a small sliver of space on the back side just wouldn’t seal up.  There could also be some slight twist in the frame.  This patient is pushing 50 years old after all.

With glue applied to both joints, and since they’re closed joints, it was too late to pull it all apart again.  At the end of the day, both joints will be much stronger than they were after the previous repair, but I’ll have to keep an eye on it.

After about eight hours under clamp pressure the patient was ready to leave the shop and return home.

A few test sittings revealed a good strong recovery with a prognosis for a long and happy life…if you can really call having someone’s behind in your face all the time a happy life.

Pete


Monday, November 15, 2010

Snow Room for Woodworking

After a long work week, travel to Denver on business, and a big project following me home this weekend, any free time that could have been spent in the workshop was filled with shoveling and removing snow.  Winter has come to Minnesota…thank God for the snow blower!

I was hoping to get some time out in the shop this week/weekend to finish up those lids for the Zebrawood boxes and maybe start playing with some jig ideas for the Lego experiment.  Alas, the only shop time logged this weekend was a mad scramble to move all yard and kid implements (“of destruction” for all you Arlo Guthrie fans) into my workshop area so that the truck could make it into the garage.

After a light, but steady, snowfall overnight, the big stuff started falling around 7:00am Saturday morning.  By around 8:00am I had space cleared for the truck and we were pushing almost 4 inches of snow with no signs of stopping!


Add a new project to the list!  Making the workshop a workshop again!


The rest of the day was spent entertaining Danger Boy and clearing snow.  Round 1 vs. Winter was a tough one.  That little Toro snow blower was a little overmatched for all the snow that had fallen, so the trusty shovel was pressed into action…and I have the sore muscles to prove it!  I finished just in time for the next wave of snowfall...doh!


Sunday was spent with family and friends, which always cures any loss of shop time, however that project for work filled my Sunday evening.  As much as I enjoy, and am thankful for, my job…Excel spreadsheets and expense modeling do not curb my appetite for making sawdust.
Pete

Sunday, November 7, 2010

Initiate Lego Inspiration in 3…2…1…

While working on the lids for the Zebrawood boxes yesterday, I also prepped some scrap pieces of Cherry and Poplar for the first of the “Lego” experiments.  While I had the planer up and running I milled the boards to a thickness of ¾ inch and then ripped each piece down to strips that were ¾ inch wide.
I was originally considering scaling these pieces using the true dimensions of a standard 2 X 8 Lego brick, however, as I scaled them up in size, the pieces would be wider than they were tall and that would be a waste of material for the ideas I’m tinkering with now.  So I landed on a size of ¾ inch wide X ¾ inch tall X 2 inches long.
After cutting the box lids to size I adjusted the stop block on the sled and started cutting “Legos.”

I was able to create quite a pile of Cherry and Poplar “Legos” from this scrap wood…giving them their second wind.


The original towers that spawned this idea are long gone.  Remember, we live with Godzilla and he eats towers for breakfast.  I had to refer back to the photos I took and build another little mock-up out of real Legos. 

This first experiment, with Cherry blocks, is based on a pretty simple repeating pattern.

When it comes time to assemble and join the pieces to create a box, a light or a sculpture, I’ll want to identify a repeating grouping that I can build multiples of to avoid smaller errors in building block by block.  I first thought of using a two block configuration, but it would have required some tricky fitting when it came time to join the pieces of the structure.  After a little more time pondering I recognized this three block pattern that will allow me to assemble upward in a spiraling pattern.  I used blue tape to hold the blocks in place.

I then made a slight variation to this three block pattern to match my original Lego mock-up.  By shifting the position of just one of the blocks, the structure widens and there are new openings and “shelves” created in the surfaces.

I used this modified pattern to build another structure, after Godzilla's bedtime, and I really like the effect it created.  There are so many more opportunities for variations in light and shadow.  I can see this making an interesting light, candle holder or lit sculpture.


I can't say what I enjoy more...construction and destruction with Godzilla, or capturing some new inspiration that I can carry into my workshop.  It feels good to get my creative juices going and to experiment with my craft...of course roaring around the living room, breathing imaginary atomic fire and leveling cities of unsuspecting Lego citizens is pretty dang cool too.  I think I'm going to stick with both.

Pete