Pages

Monday, April 30, 2012

CO Workshop Update #13 - I've got it pegged!

Danger Boy and I made our weekly pilgrimage to Home Depot to re-stock our supply of screws and secure a sheet of pegboard for the workbench along the back wall.  I had plenty of scrap 3/4 inch plywood on hand so the pegboard tool rack went up pretty quickly.
 

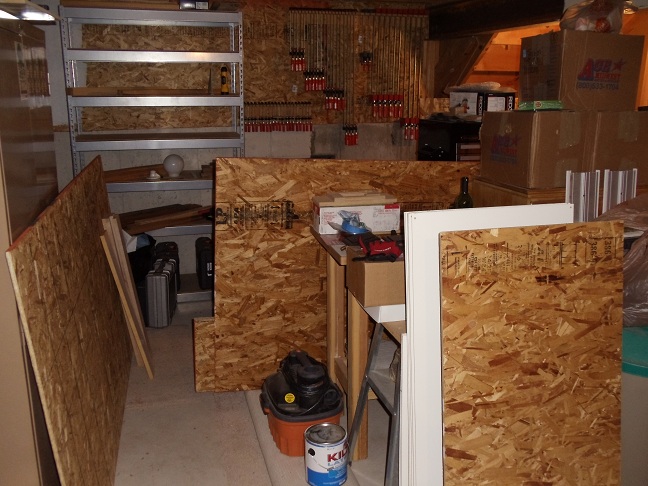
I also noticed a little bit of wracking movement from front to back on the bench…not much, but left over time it would continue to magnify.  I added a couple panels on each end to lock down any movement in that plane.  Now the bench is rock solid.  I can’t make it move now, even with some considerable force applied.


The Caps squared off against the Rangers on Saturday in Game 1 of the second round in the Stanley Cup Finals.  DB and I made a run to Sam’s Club to pick a few things up before the game and ended up bringing one of these rolling tool carts home.  The Caps ran out of gas in the third period, but the tool cart came together great.


It’s a nice size and the heavy duty casters are very smooth.  I’m planning to use the cart as a multi-function rolling bench.  The top two drawers are loaded up with all of my sharpening supplies, both for the bench grinder and my water stones and Scary Sharp paraphernalia.  When it’s time to sharpen, I’ll move the grinder, or the glass plates to the bench-top and roll the cart to whenever I want to work.  The third drawer holds all my scroll saw gear…same story…when needed I’ll load up the scroll saw and roll to the best space to work.  The large bottom drawer is filled with sanding belts and drums for the Ridgid oscillating sander.  I see myself wanting to work with the sander outside whenever possible, so the cart will make moving in and out of the shop much easier, and having all the accessories already onboard means just having to load up the tool and I’m ready to work.

I also landed on a home for my rolling tool chest.  I’ve got wrenches, Japanese chisels and saws, my circular rail clamps and guides and most of my shop-vac and air compressor accessories tucked away in this chest.


I’ve decided to not cover this small section of the wall with OSB.  There are electrical, HVAC  and plumbing running through this little section of the wall, and none of them are contained within the framing very well.  I’ll go back and remove the old insulation and touch up any gaps with expanding foam.  I’ll then add some new insulation, with some strategic cuts to work around all the utilities, and cover this section with some heavy gage plastic sheeting.
Hopefully all of my adjustments will prove more effective than the Caps' efforts in the third period.  Good thing for the Caps it's best of seven!

Wednesday, April 11, 2012

CO Workshop Update #12 - I'm Going to Need More Beer

Welcome back to Fine Woodworking with 2X4s and OSB!  OK, so it’s been a while since I’ve posted, but there really has been quite a bit of work done down in the shop.  I was able to unpack several more boxes and I’ve now got about 95% of my lumber collection stored properly.  I’m still tinkering with a few ideas for some of the longer stock.


While I haven’t completely committed to this location, I did find a place to park the router table.  Right now I’m thinking about keeping it here next to the drill press and storing my router accessories up on the shelf there on the wall.
 
The table is an open design, and I’m thinking of enclosing it to contain dust and wood chips.  Now that I’m down in the basement dust collection/containment has become much more important.  My Dad and I built this table several years ago when they visited us in Albuquerque.  A few weeks after their visit I received a package in the mail…surprise!  Dad built this amazing fence for me!  It’s been a great addition with lots of adjustability and T-slotting for attaching feather boards, jigs and stop blocks.  Another nice feature is this opening in the back of the fence.


I’m playing with the idea of building a detachable dust shroud so that I can hook the shop vac up to the fence to remove any dust and chips right there at the bit.  When I was working in garages the dust wasn’t much of an issue.  I usually had the router table right there at the garage opening and would just have the door open while routing.

The biggest victory in the battle to organize the shop was the addition of a storage/work bench along the back wall of the shop.  Technically that wall runs along the side of the house, but looks like the back of the shop.  So the side is the back and the back is the side…the ceiling is actually the floor…and your seat cushion can be used a floatation device.  Got all that?

Here is the new bench in the planning stage.  You can tell it’s the “planning stage” because I’ve got the laptop out, a bag of pretzels and a beer…all the essential planning tools.

I decided to build the bench using some modular frames, so everything was cut to size on the table saw.


The off-cuts were quickly scooped up and sanded by Danger Boy.

He’s all about sanding things now.  Surely there is a way to harness this power for good!  He even checks to see if he can still feel the ridges in the end grain.


With the scrap sanding well cared for by the boy, it’s over to the workbench to start building the frames.


Here is one of the completed frames.


I built four of them to frame out an eight foot bench.


The frames were joined into one bench unit with 2X4 stretchers.

3/4 inch OSB makes for some really beefy lower shelves.  Each shelf is screwed into all four of the frame units, adding to the overall strength of the bench.


I doubled up two pieces of the OSB for the top to give the bench a heavy, flat work surface.  This one will be trimmed out just like the top over on the drawer unit bench you saw in a previous post.  The top layer will be removable should it ever need to be replaced.


You can see that I left a lot of height for that first shelf to accommodate several of my bench-top tools.  I measured them all and the Ridgid sander was the tallest, so that shelf height is based on storing that tool specifically.  The bottom shelf is just the right height for storing smaller things in boxes…in this case Grain Belt Nordeast boxes.  The problem is that I only have a few of these boxes from what became my favorite beer during our short time in Minnesota.  For any of you up in the Land of 10,000 Lakes that might find yourselves making a trip down to Denver, feel free to bring a few (dozen) boxes with you…preferably with the beer.   I can’t have a mismatched set of storage boxes, right?

Next up will be a pegboard rack to fill the space between the bench top and the wall shelves.  I’ve got room for an 8’ by 32” run of pegboard in that space…and now I’m wondering why I even bothered to paint that back wall.
Pete

Monday, March 19, 2012

CO Workshop Update #11 - I Can Move

Well, you know what they say…”It’s not a workshop until your autographed pictures of Mike Modano and Dean Shmyr are on the wall.”  I’m pretty sure it was Roy Underhill that first said it.


This small bump-out is housing the supply line and the main drain from the kitchen just above the shop, so I needed to keep this space free of anything big attached to the wall.  I keep my full sheet sandpaper in the file cabinet along with tool manuals and any project clippings and pictures I want to save for future inspiration.  If needed I can just move the cabinet and little shelf aside and remove the wall panel to access the plumbing.


During (what is now becoming a weekend ritual) my latest trip to Home Depot I picked up a load of 2X4s for the bench I’ll build along the back wall and some ¾ inch OSB for the bench top on the recycled base cabinets.
 

I doubled up the thickness to make a really flat and beefy top.  I’ll come back and trim out the edges with some Poplar as well.  I wanted something that could take a lot of abuse and then be replaced pretty inexpensively and also like the idea of being able to anchor something down to the bench top with screws if needed.  I had originally thought of laminating the two sheets together with glue, but opted to just screw them together.  When it’s time for a new top I’ll be able to unscrew and remove the top sheet without having to completely disassemble the top.  When I trim the edges out, I’ll be sure to only attach the edging to the bottom sheet that’s fastened to the base cabinets.

Over the past few years I’ve amassed quite a collection of smaller scrap pieces that I’ve held onto for smaller projects.  I used to stack them in piles on shelves or tuck them away in boxes where I would forget about them.  I’ve decided to utilize several of the smaller top drawers in these cabinets to store my collection of smaller stock.
 

We’ll see how long this lasts as I get to putting everything else away.  If I find that I need more space for tools or accessories it may be back to the piles or boxes for these shorties.

With the unpacking of another half dozen boxes…yes folks, you are witnessing actual cleared floor space in the shop.  No more dodging around an obstacle course of unpacked lumber and tools…no more slalom maneuvers all the way around the shop just to get to the other side.  Oh man…there goes my exercise program!

Here’s a look at the left side wall of the shop.  I moved the other rack down to this side of the shop and started stickering and stacking some of the smaller slabs of lumber.


I hung the “two inches too long” shelf a little further down the wall and placed the drill press in its final resting spot.   I’ll stow all the drill press paraphernalia there on the shelf, and either the router table or one of the mobile tools will find a home there along the wall once those few boxes are unpacked and put away.

                             
While I’d like everyone to believe that I’ve completely cleaned up my act, there is still a fair bit of work to be done…so here’s the dirty laundry.  Let’s just call these the “staging areas.”

I’ve got a few more sections of wall to get covered and painted and another half dozen boxes to unpack and organize.  Another couple weekends like this last one and there might be some actual woodworking on the horizon.
Stay tuned!

Pete

Sunday, March 11, 2012

CO Workshop Update #10 - Low Down Theft

OK, so it's really more like borrowing an idea that was shared, for a table with a low surface for working on projects down lower than the main workbench.  To those of you expecting the equivalent of a crime show episode...read on, I swear this is just as riveting!

Once again, I gathered some great advice from the online woodworking community on setting up the recycled cabinets we picked up last year.  I was tinkering with the idea of making as low a bench as possible for things like assembly and finishing.  After putting a top on the cabinets the total height would have landed at around 31 inches.  From what quite a few folks have said about their own assembly tables or benches, they like to go a bit lower than that…somewhere in the 22 to 24 inch height.  With that, I’ve decided to build a riser on which to place the cabinets.  With the added top, the total height will come in at just over 34 inches, about two inches shorter than my main island bench. 

I think I was trying to squeeze too much functionality out of these cabinets, so I’ve decided instead to shamelessly steal an idea from Rick Dennington over at www.lumberjocks.com and build a low assembly table just like his.  I like the idea of making the table mobile, so I’ll also include casters as Rick did.  He calls this one his smaller assembly bench…coming in at 32” X 70” and 22” high.


The big assembly bench is nice too, but I don’t have near enough room for something that sized!


Thanks to everyone (at Lumberjocks and the other woodworking forums) for sharing your advice, and to Rick for posting pics of his benches!

So with a new plan in the works, I whipped up a quick, deck type frame with the last three 2X4’s I had left in the shop…whew, just enough!


I was going to cut into a full sheet of OSB to make a base surface for the frame but ended up using these two pieces I had tucked in the corner, left over from some of the panel work on the walls.


I have a total of eight base cabinets…three with a drawer and a door and five with all drawers.  I decided to put the five drawer units here under the window, giving me seven and a half feet of storage and new bench-top space.
 

I was thinking of going longer, but I’m also looking to build a bench along the back wall with open shelving to house my larger bench-top tools (scroll saw, belt/spindle sander, miter saw, etc…) and I’d rather have that bench extend into that back corner.

So even after all this work and after all these updates, it seems like I have a longer project list than when I started!  With the bench along the back wall, the rolling bench (a la Steve over at Woodworking for Mere Mortals) and now a low assembly table…sheesh, I’d better quit working on the shop or I’ll never be done!  JUST KIDDING!  J

The kicker is explaining to others, and my lovely bride, that I’m building projects FOR the shop so that I can build other projects FOR the shop so that one day I can build projects IN the shop!
Pete

Monday, March 5, 2012

CO Workshop Update #9 - How Low Should I Go?

It’s time to give those cabinets we picked up (for free) last year their “second wind.”  They’ve done a great job at taking up parking space in the garage, but it’s time for them to answer a higher calling…and my lovely bride would like to park indoors…silly woman!  Yesterday I brought one of the three drawer base cabinets down from the garage to see how they’ll look under the windows. 
  
There is still a good bit of space between the top of the cabinet and the bottom and top of the window sill, so I’ve got a little room to play with in raising the height.

The height of the cabinets is 28.5 inches, so I’m thinking I can build a 2X4 deck frame to raise the cabinets up a few inches and still have enough room to install a bench top of 1.5 inch thickness.  That would put the bench top surface at just under 34 inches…falling just below the bottom of the window sill, and about 2.5 inches shorter than my main workbench.

I could go up another 1.5 inches to the top of the window sill and not interfere with the function of the window, but right now I’m thinking about keeping this surface a little lower as an assembly area. 
Any thoughts from my fellow woodworkers?  Do any of you have a lower bench surface for assembly or finishing?  Should I consider scrapping the idea of a deck frame all together?  Without the frame I could add a bench top and clock in at around 30 inches in total height.
I’ve got five of these drawer units and a few base cabinets with doors, so it looks like I could string together somewhere between 9 and 14 feet of work/storage space.  I’ll make the final call when I finish working up the plans for some bench space along the adjacent back wall as well.
The total depth of the cabinets is 22.5 inches from the back of the cabinet to the face of the drawers.

When I build the bench top I think I’ll go with a 24 inch depth so that I’ll have some overhang of the work surface to attach clamps to.
We’ll see how things go with the day job this week and if I’ll be able to get some time to start installing the cabinets in the evenings.  If not, it’ll be a bit quite in the shop until next weekend.
I’ve got another project on the short list as well.  After needing to rip quite a few longer pieces of material on the table saw over the last few weeks, I’ve really come to see the need for a rolling work cart/bench that is the same height as the saw’s surface.  I’d like to be able to use it as an in-feed support for the table saw as well as being able to roll a portable work surface out onto the back patio to work outside…once it’s a lot less wintery out there, that is.
I really like the simple design that Steve, over at Woodworking for Mere Mortals, came up with a while back, so I think I’ll be looking at something very similar.  Give his rolling bench a look (and check out some of his other videos as well!)
I may try to modify his design a little, maybe add some sort of lower storage bin so that the cart can be loaded up with tools and clamps before doing any off-road woodworking in the back yard. 
I’m always amazed when getting a peek into other woodworker’s shops at how resourceful folks are.  Almost every shop I’ve seen, in person or online, incorporate quite a bit of reuse of tools, furniture/cabinetry and materials.  I guess it’s in the nature of the craft, to salvage and make best use the materials we have on hand, or that we can pilfer from others.  Everyone’s shop is an expression of themselves and the type of work they like to do.  It’s a custom haven in which to design, create, become inspired (or frustrated!) and even to escape the day to day and find some solace in some good, old fashioned work with our hands and minds on something tangible.  Sometimes running your hands along a finished piece of work really puts that amazing performance model in Excel to shame.
Pete

Monday, February 27, 2012

CO Workshop Update #8 - Measure once, cut once, build another one.

Things moved along pretty well over the weekend here in the Second Wind Workshop.  I was able to get the OSB up on the back wall, and Danger Boy and I got some painting done…some of it even on the walls!

I also repurposed an old wall cabinet and set it up on one of the shorter steel racks.  It’s just a step away from the table saw so I’ll store saw blades, jigs and accessories in the cabinet and all of my sleds on the shelves.  There was also just enough room for the, all important, shop fridge.

While setting up the cabinet and fridge Danger Boy was thrilled to find his toolbox and start reacquainting himself with his tools.  It was all I could do to keep him from disassembling everything in the shop and from wanting to cut into every piece of wood with his coping saw…while wearing eye and hearing protection, of course.

After heading off the maniacal woodworker, we got busy on some shelving for the back wall.  The plan is to hang shelving along the top of the wall with pegboard and a long storage bench below.  I had a whole stack of off-cut 3/4 inch plywood that made the trip with us from Minnesota, so we got crackin’.
And here they are!  Aren’t these great looking shelves?  Very sleek and modern, eh?

OK, so maybe they did need a few screws and some wood glue.

The back section of wall where these will hang spans 10 feet and 7 inches so I planned to build three shelves to cover that entire length.  The shelves rest on a mounting cleat and are attached to the wall through a second cleat at the top of each unit.

We were clicking right along until it was time to hang this third shelf…

While I had accounted for the width of the plywood in determining the height of the shelves…well, you can see that there was a slight miscalculation in the total length.

I was tempted to blame it on the difference in humidity levels between Minnesota and Colorado, much like those troublesome box lids, but somehow I didn’t think that the lengthwise expansion of plywood would fly with the super-savvy woodworking community.  Where is that boy and his coping saw when I need him?!
Fortunately I’ve got plenty of wall space to find another home for this shelf, and plenty of swollen Minnesota plywood to build another that will fit.  I think that new one will be a great place to store all of my measuring tools!