Shop time has been precious and rare over the past couple months...other than late evenings when power tools are off the menu. Lots of travel and work, but despite the busy schedule I was finally able to put the wraps on five of the boxes that I had in the works.
And now, without further ado..."Behind this first door...box number one." (Eric Idle game show voice...)
Recycled Oak with Claro Walnut corner keys and a Sapelle veneered lid panel.
Unfortunately the camera isn't catching the shimmer in the Sapelle as well as it looks live.
Box number one will be headed back east to Bonnie, the most generous contributor to the "Go Lobos" WCC fundraiser. Please visit http://www.nywolf.org/ to lend your voice to the HOWL in protecting our endangered wolves, including my favorite (and college mascot) the Lobo.
Box number two is made with woods that span three continents...American Oak, African Padauk corner keys and a curly English Sycamore veneered lid panel.
This was the box that received all of the test cuts along the way before working on the WCC charity box. See some of the gory details here...
http://secondwindworkshop.blogspot.com/2013/04/a-slip-of-bit.html
http://secondwindworkshop.blogspot.com/2013/04/filling-gap.html
Three coats of hand rubbed Danish Oil really warms up this old, recycled Oak and makes the English Sycamore POP! Again...I wish my camera and lighting did this thing justice.
And finally, you may recall the earlier sightings of this triplet set of Padauk boxes...
http://secondwindworkshop.blogspot.com/2013/04/more-happy-mistakes.html
The lids for these boxes are quarter-sawn, spalted Maple. I experimented with the design of this first lid by cutting a small stepped profile along the top edge. I'm still deciding if I like this style or not. Click to enlarge these pics to get a good look at the stunning grain and funky spalt-line patterns. All three boxes were finished with three coats of hand rubbed Danish Oil, buffed between each coat.
No extra profile treatment on these next two lids.
The third box didn't receive any Wenge inlay as I was able to get a clean match of the heartwood/sapwood transition around all four corners.
You're probably thinking, "Hey, that's great Pete! Must feel good to get caught up on your projects." Of course, if you're thinking that you're probably new to my blog!
(Queue Eric Idle...)
"Behind door number two...an unfinished display table."
"Behind door number three...a pair of Rietveld Chairs resembling a pile of sticks."
"Behind door number four.........."
Pete
Thursday, June 20, 2013
Sunday, May 5, 2013
Krenov Comments - Part 2
What makes a master craftsman decide what they want to build
and how they’ll go about doing it?
"Most of the
work I do is fairly small. This is partly because to me wood is precious, and
very often I have planks with parts that contain something that interests me
and may lead to a certain piece being made. Also, my shop is small, with rather
unprofessional equipment; it is difficult for me to join and surface wide
stock. And finally, by my nature I have a tendency toward detailed work; there
is a dimension beyond which I feel I will accomplish less rather than
more." - James Krenov
While looking at Old Jim’s lifetime of work, one might never
consider that he made decisions about the pieces he built based on the size of
his shop or the quality of his tools.
While he does state that he prefers detailed work, he eludes that
working in a small shop with modest tools does impose some limiting factors. He just chose to not let those things limit
his enjoyment and advancement of his craft.
Does this look like the work of someone held back by not having a massive shop or the latest and greatest collection of tools? I would be remiss to not confess that I would happily move into a spacious shop equipped with the hottest new tools, but the fact remains…none of us should be limited by the accessibility of these things. Many of the masters that we admire so much started at a very stark beginning, working with humble tools and materials for pleasure of the craft and with a hope to learn something new with each and every task…oh, and maybe to feed their families!
Pete
Sunday, April 21, 2013
Krenov Comments - Part 1
I’ve had to make a fair bit of travel for the day job
lately, so I found myself with lots of reading time…a.k.a. hours and hours spent
in airports and on planes. While not the
most comfortable place to lounge with a good read, I have been using the time
to finally take in James Krenov’s “A Cabinetmaker’s Notebook.”
As difficult as it is to find copies of some of his books,
it was incredibly easy to uncover a multitude of articles and quotes
online. While surfing for an affordable
price on “With Wakened Hands” (still not found) I came across several
interviews that really got me thinking about the man and his life of woodworking. Today I’ll share this quote to consider for
thought…
I don’t believe that I’ve met another woodworker who isn’t
inspired by Krenov’s pieces, moved by his words and challenged by his passion
and methods of work. It was a sad day on
9/9/09 when we all learned of his passing.
As I dug into “A Cabinetmaker’s Notebook” I became interested in
tracking down some of his other works. I
remember seeing a copy of “With Wakened Hands” in a bookstore many years ago
and now I kick myself for not purchasing it then. The only copies I can find online are used
and are fetching quite a price…over $200 in some places.
"...form is only a beginning. It is the combination of feelings and a
function; shapes and things that come to one in connection with the discoveries
made as one goes into the wood, that pull it together and give meaning to
form."
There are several
accounts of how “Old Jim” would often set boards on end, leaning against the
wall so that he could look at them for extended periods of time, sometimes
days, weeks, even months…just waiting for the wood to
reveal shapes in their grain and tone to inform him of what he should fashion
them into.
I’ve only done
something similar a few times over the years. I’m now considering setting some
space aside to display several of the more special pieces from my wood
collection so that they are always on display…quick to come to mind, waiting to
inspire.
How many of you
have tried this before, or are moved to try it now, knowing that one of the
greatest masters of our craft produced some of his most famous designs by
observing and waiting…thinking and dreaming…and maybe even stubbing a toe on those
boards he left laying around from time to time?
Have you ever
been struck by a piece with such a striking pattern or form that you knew
exactly what it should be used for? I
have a pair of book-matched, Padauk boards that are screaming out to become the
doors of a cabinet, consequently in the same design aesthetic as Old Jim
himself.
So go on then…step into
your shop and find that special slab of lumber that you bought and have been
holding onto “just because.” Set it on
display, in full view. Let your eye and
your mind wander to that piece and really consider what it should become.
Pete
Tuesday, April 16, 2013
More Happy Mistakes
In the spirit of celebrating those little missteps that make
us rethink, reevaluate and recover, I offer you three Padauk boxes that have
been sitting on my unfinished projects shelf for some time now.
These boxes are made from a couple of very special Padauk boards
with both heartwood (red) and sapwood (white.)
The intent was to have the transition line between heartwood and sapwood
wrap around all four corners. For any of
my long-time readers, you may remember this…
I’ve since learned a different way to achieve this effect
with some creative resawing, however that doesn’t solve the issue with two of
these three boxes.
I then pressed the Thin Rip Jig into service (find this little gem at www.rockler.com ) to cut inlay strips from some quartersawn Wenge stock.
I decided to experiment with two different looks. Some of the inlay features the face (tight grain lines) and some of it shows off the wilder edge grain surface.
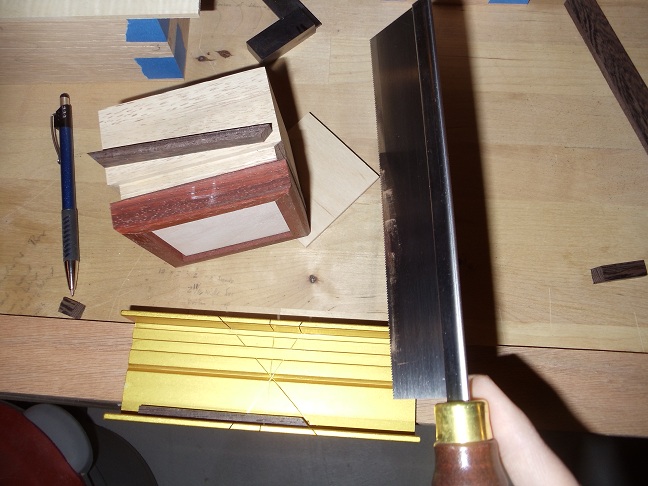
I attempted to trim the inlay pieces, with mitered corners to match the box joinery, on the table saw. The pieces are so small and the Wenge is so brittle that many of the cuts chipped out…very ugly! If you’re looking to spend a little bit more of your woodworking allowance (You do get one, right? J) you can pick up this great little Razor Saw and miter box from www.leevalley.com for about $30.
The Razor Saw gave me perfect, clean miter cuts. I worked my way around the sides of the boxes, cutting each piece precisely to fit.
Every now and then a little tuning was required on the cordless sander.
Once all four pieces were cut I taped them up into a dry fit to test all of the mitered joints.
Then it was time to lock it all in with the glue and clamps.
I left the inlays just a little proud in thickness so that I could trim them flush once the glue had cured. The box that does have a successful transition around all four corners was left alone. I make mistakes, but I’m no dummy!
Dad’s old Lie-Nielsen chisel plane did a great job paring down the Wenge strips.
Then it was back to the cordless sander to clean up all of the surfaces.
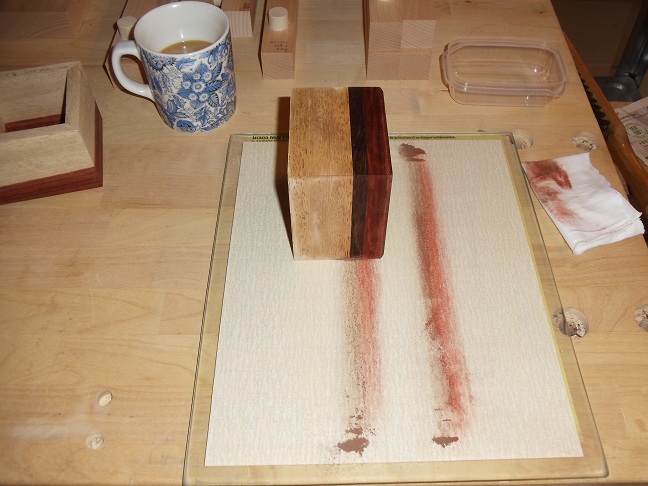
I find myself using this piece of plate glass with sandpaper on most of my smaller projects now. It’s a great way to turn a piece of sandpaper into a fine tuning tool, and it doesn’t make any noise…perfect for those late night, gotta-get-some-shop-time sessions that occur when the rest of the family is asleep.
Tune in next time to see how we’ll put a lid on these boxes
and move them from the unfinished project shelf for good!
Pete
Monday, April 15, 2013
Filling the Gap
After the unfortunate “Bit Slipping Incident of 2013” I was
inspired to a solution by some time away from the problem, and found great
confirmation in my online, woodworking brothers and sisters. This gap can be patched and the box side
saved!
I marked the corner of the groove with a Sharpie to
emphasize the grave nature of the dilemma.
I then applied the pattern to an extra piece of the salvaged Oak.
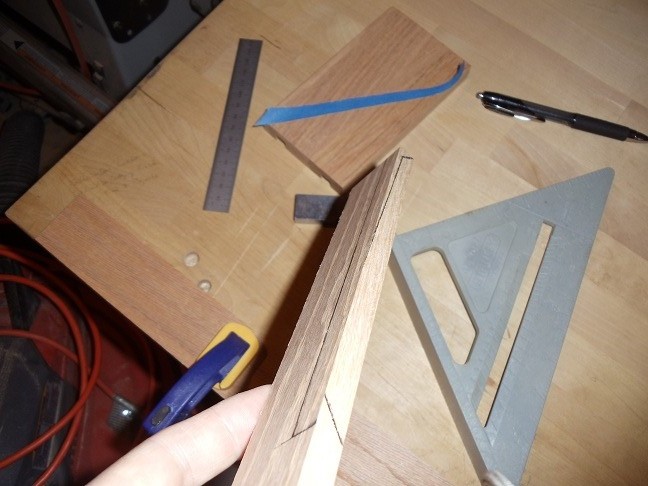
Using a gel pen, I traced the pattern onto the side of the piece and marked out the length and width needed on the face.
After ripping the part to width on the table saw I made the final cuts to add the mitered angles and bring the piece to the final length.
A little fine tuning on my “cordless” sander…
…and the patch slips right into place.
A little glue and the deed was done. After curing overnight, the piece was ready to be re-cut at the router table.
Given the sour reputation of the Hitachi M12V and it’s 1/4 inch collet insert sleeve, I opted to install the DeWalt DW621 in the router table. The 621 is actually my favorite router (not sure why they stopped producing it) however, I’ve had the Hitachi in my router table for so long that I didn’t think to switch it out. I was reminded of one of the features that make the 621 so special. While re-cutting the grooves in all of the box sides I ran a vacuum line to the dust port on the router and the cuts were virtually dust free. With the exception of running larger profile bits, the Hitachi may not see much duty in the router table for a long time to come.
Sorry Big Green…
…but Ole Yeller gets the nod.
Pete
Tuesday, April 2, 2013
A Slip of the Bit
This past weekend I experienced one of those days when I was
really excited to be out in the shop. I
was anxious to try a new technique of making fitted lids for some boxes that
are in the works. I had watched a video
online several times, making sure that I had accounted for all of the
steps.
Bit selected…check!
Test piece selected and marked…check!
I even traveled to the Fourth Dimension to set the max bit height on my test piece.
http://secondwindworkshop.blogspot.com/2013/02/the-fourth-dimension.html
The first step of this process is to route a groove in all
of the inside surfaces of the box, before assembly and glue-up. In this case I’m routing a 3/8 inch wide
groove to a depth of half the thickness of the box walls…5/16 of an inch for
these boxes.
My plan was to route these grooves in three passes to reach
the final depth. My test piece and the first
box part were successful on the first pass.
Upon routing the second part (one of the longer sides of the box) I
noticed a little different sound and feeling as I came to the end of the cut.
I shut down the router and examined the piece…oh man! As I pushed this part over the router bit it
had gradually slipped up and cut my groove deeper and deeper along the length
of the piece. It would not have been too
drastic had it not gone beyond the final depth I was shooting for, however…
Start of the cut…
End of the cut…
The time away has been very fruitful though. By stepping away and giving the problem some
good thought I believe I have a very workable solution that will allow me to
salvage this piece and complete the box.
Stay tuned for a post on that process!
The time away (surfing the internet) also revealed that a
common cause of a slipping router bit is the presence of any debris or rust on
the bit shank or collet. Sure enough I
did find a little bit of dust and rust on the collets of my M12V router. A little WD-40 bath and a good wiping have
them cleaned up nicely. I also learned
that the M12V has a reputation for slippage when using 1/4 inch shank bits
because you’re using a 1/4 inch collet insert inside of the 1/2 inch
collet. My DeWalt DW621 has dedicated
collets for both 1/4 and 1/2 inch shanks, so I believe I'll swap routers when I’m
ready to finish routing these grooves.
It’s always frustrating to see a plan fall apart or
experience an error where you weren’t expecting it. The key is to take a step back, stay calm and
give it some thought. Solutions will
come to those who look for them and ask the right questions. I’ll confess to getting a little angry and
sulking for a few minutes, but if you’re passionate about something you’ll come
back to it quickly, renewing your focus and digging in to repair or even
reinvent. Don’t give up!
Pete
Subscribe to:
Posts (Atom)